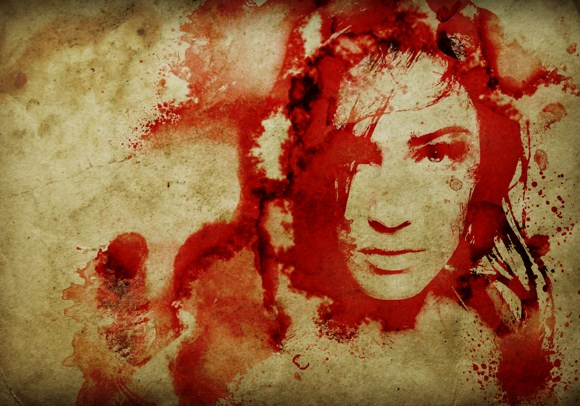
Let me share to you a simple trick in Photoshop where we create a badass antique looking portrait painted in blood. Speaking of blood, this tutorial does not involve any gore actually. Well, except for the name we call it. The final output seems similar to the loading screen we find in Dragon Age Origins PC game. This Photoshop effect is also known as the bleeding watercolor effect. So, here you go folks.
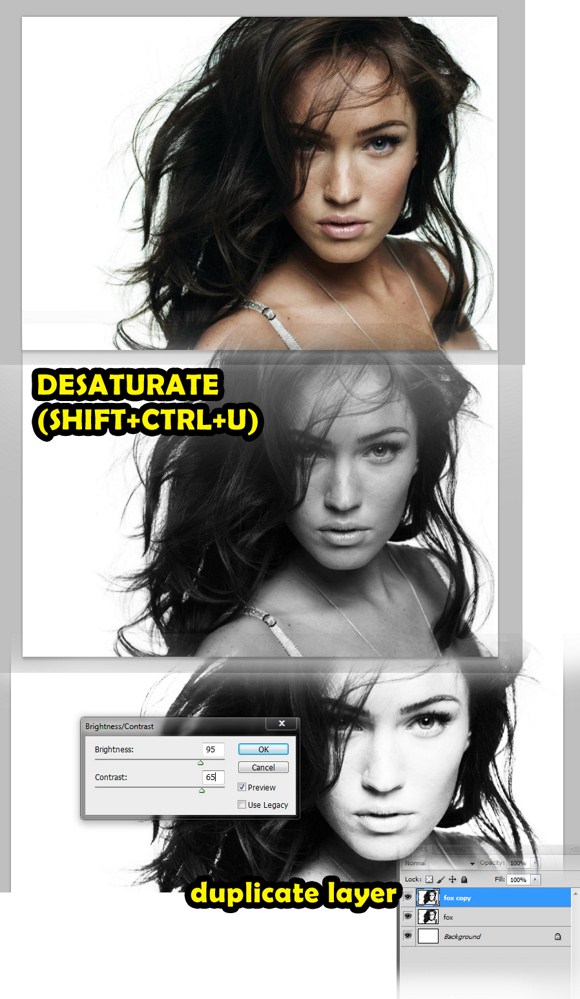
First thing to do is to find and download a picture of a person. In our example, I have downloaded a picture of Megan Fox with white background. I suggest you secure a photo with white background to try this effect.
Import the picture to your widescreen format document. You may have to resize to fit the picture. Press SHIFT+CTRL+U to DESATURATE the picture. Go to Image > Adjustments > then adjust the photo to achieve a high contrast picture. After that, duplicate this layer.
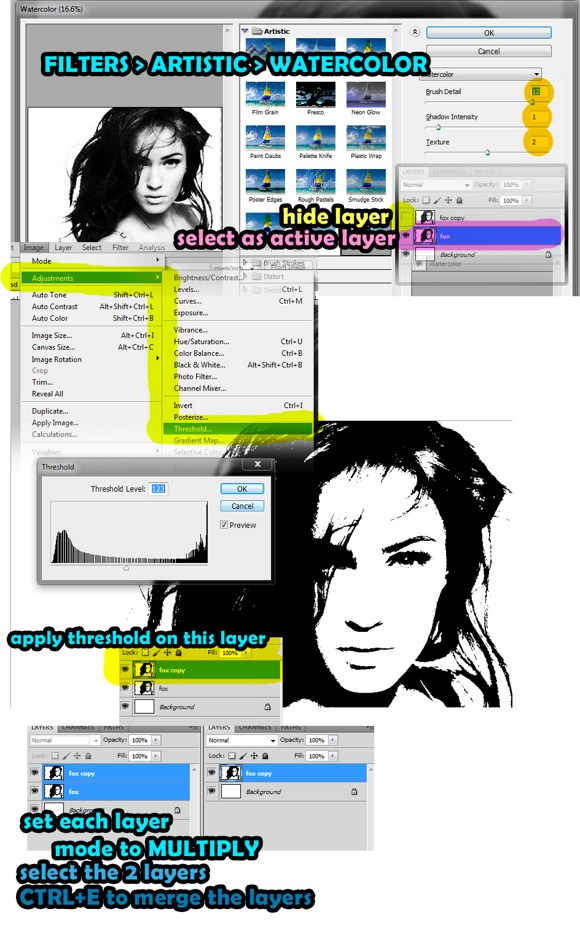
On the layers palette, hide the duplicate first, then select the next layer as active. Go to Filters > Artistic > then selecting Watercolor to apply watercolor effect. Use these settings: brush detail = 12, shadow intensity = 1, texture = 1.
Make the duplicate layer/image available again through unhide button. Select that layer as active. Go to Image > adjustments > and find the THRESHOLD function. After that, change the layer blend mode of EACH layer into multiply. Merge the 2 layers afterwards by pressing CTRL+E.
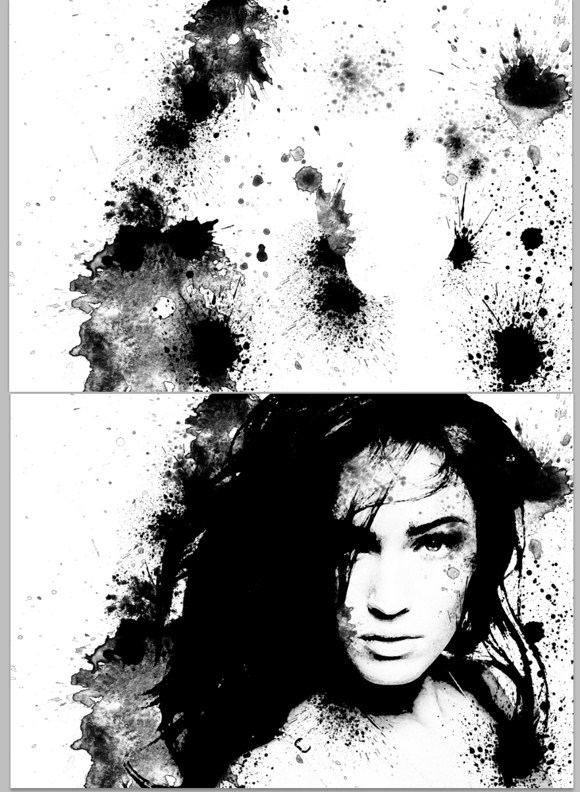
Now we are going to prepare for the watercolor or blood patterns. First search and download free images using these keywords, watercolor, paint, splatters, or splat. Try to find ones like you see on the images below. It is strongly suggested you search for “watercolor splatter Photoshop brushes. Once you have downloaded the necessary files, import these images to the main project document. You may use brushes (*.abr files) or image formats to add the splatters. Brusheezy dot com is one great place to start looking for splatters.
If you are using brushes, use black as color. If you are using images, import first, the DESUATURATE image using SHIFT+CTRL+U. you can use burn tool, or duplicate the image to add intensity to the splatter. After adding the splatters, merge that splatter layer with the face layer.
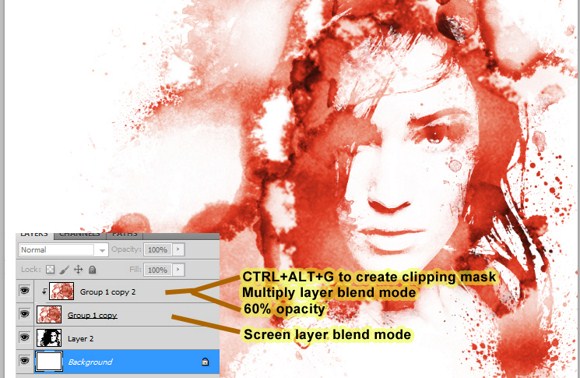
Now download or use a second set of splatters. But if you have not got one yet, you may actually use the same brush or image set. Create a new layer and FILL it with white background, and partially fill the whole canvass with watercolor stains, splatters like you see below on the example. Again this will be quite tricky if you use images instead of brushes. For now let us stick to Photoshop brushes. Assuming you already know how to load custom brushes to be ready for use in Photoshop, paint using the splatter brushes to fill the canvass. Use 60-70 percent opacity(depending on the brush default opacity) and blood RED as the main color.
Some splatter brushes have semi transparent properties which when used, does not apply in full strength even when the brush is set to max. you may have to create duplicates or apply paint twice to add opacity.
Set the layer blend mode to screen. Duplicate that splatter layer, but change the layer blend mode to multiply with 60 to 70 percent opacity. After changer blend modes, press CTRL+ALT+G to clip it to the layer below.
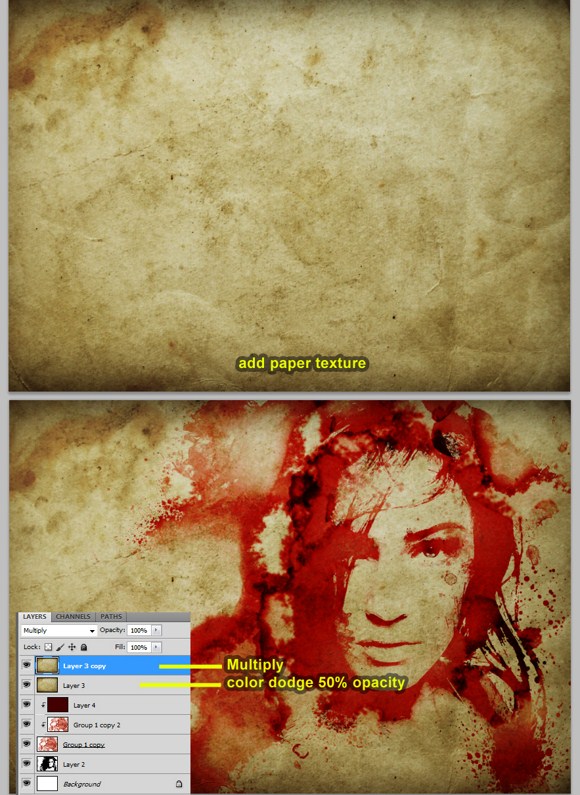
And last steps. Open up your browser, search and download images using tags “paper texture”. Make sure you download those with reasonably large resolutions. Import the paper texture to the project. Duplicate the texture layer. Set the topmost texture layer to multiply layer blend mode with 100 percent opacity. Set the second texture layer to color dodge blend mode with 50 percent opacity or more but not close to 100 percent. And there, you have now a portrait of a person painted on an antique piece of paper and painted in blood.
That is it for this week. Hopefully you learned a lot and had some fun. Please ask questions and share your creations in the comments.

