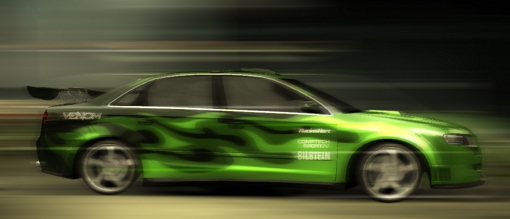
Motion Blur is an effect in Photoshop under the blur filters which renders an image blurred but with direction and sense of speed and movement. It is somewhat similar to overstretching an image but it is more realistic because it applies blur.
This guide will help a beginner learn how to apply motion blur effects in Photoshop to create unique and creative designs and images.
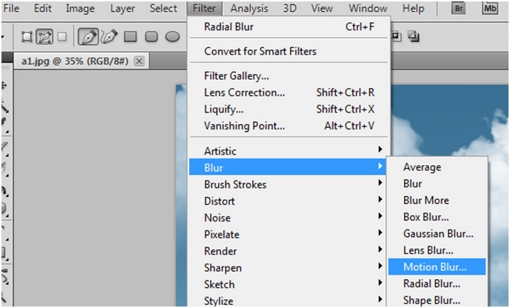
Motion blur is located in the Filters > Blur > Motion Blur.
Motion Blur can be applied in directions. We will use this cloud image as an example.
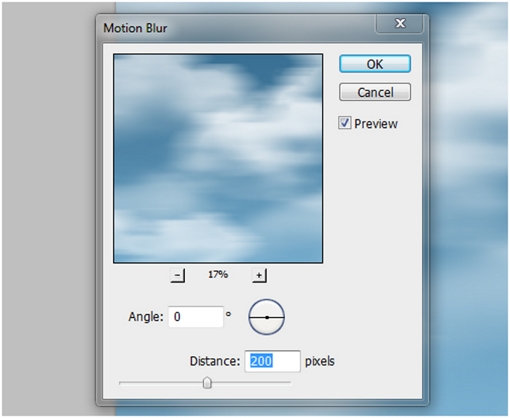
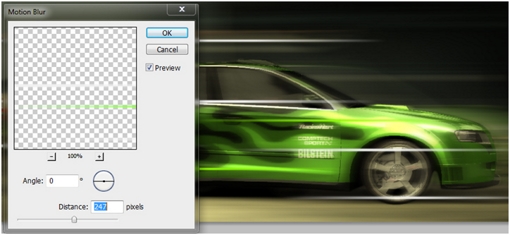
By opening the motion blur effect tab, we gain access to the adjustment parameters which include angle and distance.
For now, set ‘Angle’ at ‘0’ and distance at ‘200’.
We can then see the image preview when we set angle and distance. Remember with motion blur the larger the number on the distance, the longer the image stretches, and it goes with the direction according to the angle given.
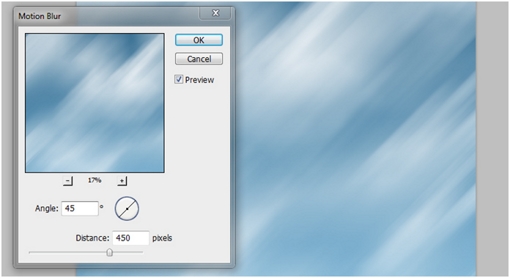
We can try different angles and amounts. Play around with the different distance and angle settings to see what you get.
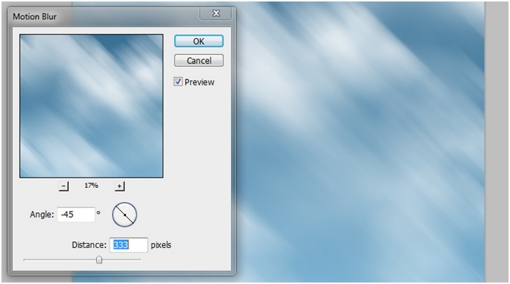
You also use negative (-) numbers in the angle setting. This will help you to achieve left or right inclined angles when you need it.
Next we are going to make a project where adding or applying motion blurs is useful. Usually, motion blurs work great when you need to apply a sense of movement or motion, direction, and speed of static and boring images. Sometimes we need to emphasize motion and speed to make an object or image interesting.
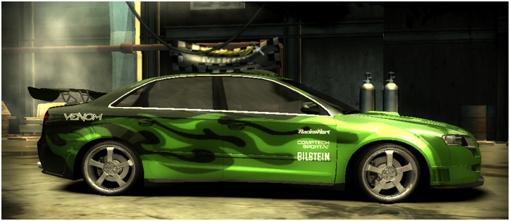
For example, we have a static image of an Audi 3.2 FSI Quattro sports car from the NFS Most Wanted video game. As you can see the car is not running. Now our job is to make it look like it is moving fast by creating a motion blurred background.
The first thing we need to do is to trace the car itself to exclude it from the changes we will be making to the background.
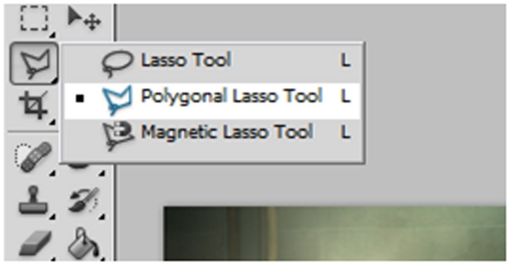
Now trace the car using the marquee tool. Now the car should be the only item selected in the image.
Press CTRL+C or copy, and paste it. Photoshop will automatically create a new layer for it.
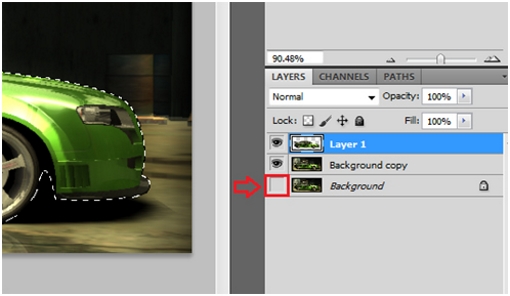
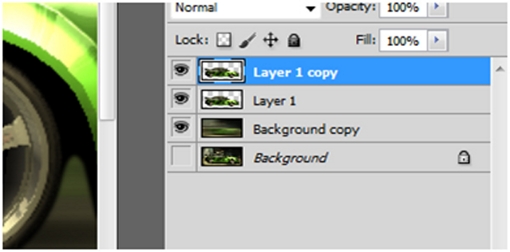
Now select the background layer and duplicate it. You should have a total of 3 layers just like the guide below.
You should also hide the background layer afterwards to prevent from any accidents incase you made any mistakes to the other layers.
Press CTRL+D to cancel selection mode.
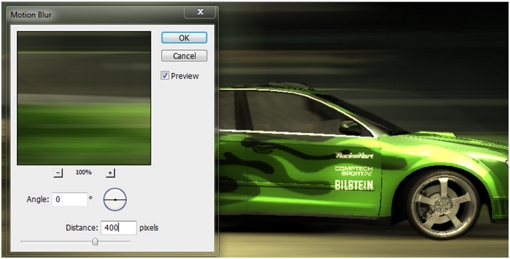
Now select the 2nd layer or the background copy, and then go to filters> blur> and then motion blur to apply the effect on the background.
Apply a distance amount of about 300 to 600 pixels, and maintain an angle of zero degrees, then press OK.
Now select the car layer and then duplicate it.
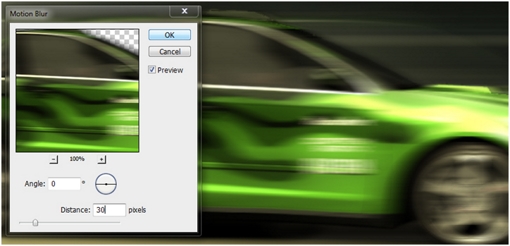
Apply a motion blur to this layer. Leave the angle to zero degrees and apply a distance of around 30 pixels, and then press OK.
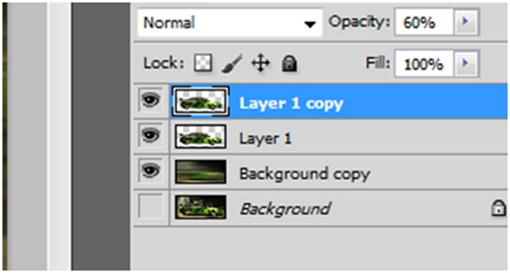
Now adjust this layer’s opacity to 60 percent.
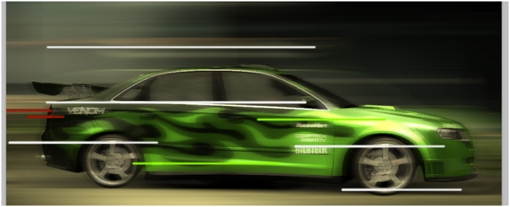
Create a new layer, add some line similar to these.
Now apply a motion blur to the lines. Put in amounts just like the example below. You can experiment with the parameters to achieve different lengths.
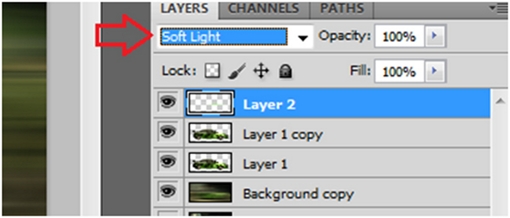
Then adjust the layer blend mode to soft light.
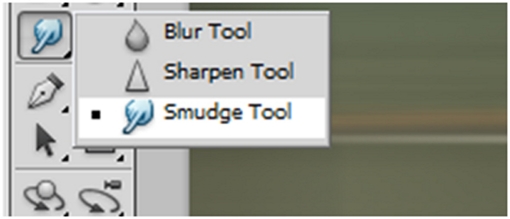
Next apply smudge to the wheels. Select the smudge tool from the tools palette. Select first the “layer 1 copy” layer.
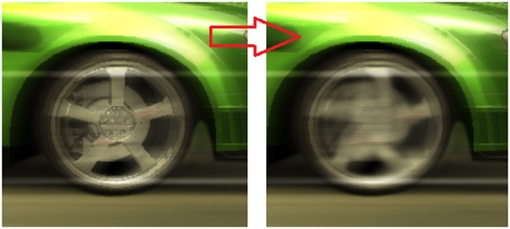
And apply it on the wheels according to the direction of the wheel’s rotation.
Notice how it makes the wheels look like it is really spinning.
Once you have completed this tutorial you should have an image of a car that appears to be moving. This was accomplished with motion blur on the background and the car along with some other tools.
Have fun with this tutorial and remember to share your creations with us in the comments section.

