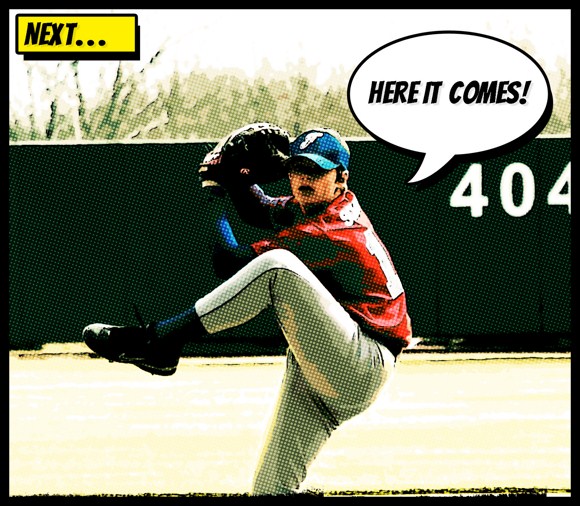
Creating the Comic Book Visual Style Effect

This tutorial will guide you how to make an ordinary photo into a comic styled image. Comics usually have their distinctive halftone effect and heavy edges. This tutorial will be a little bit confusing so strap yourselves up and get pumped up for this comic visual effect project.
First you need to have a good picture to work on. Landscape scenes will be very good with this effect, so use photos with people in it. Here, in our example we used a picture of a teenage boy about to pitch baseball.
Open and image in Photoshop. You may also need to resize you image to about 2000 pixels in width to match your image resolution to the resolution used in our examples.
Duplicate the original layer of the image and rename it to ‘cutout’. On the cutout layer, go to filter > blur > and select Surface Blur. Use 5 pixels as radius and enter 15 in threshold. Then apply the effect.
Next, duplicate the cutout layer. rename this layer into ‘desaturate’. To make this layer in black and white or desaturated, press SHIFT+CTRL+U.
Now, hide the desaturate layer temporarily by clicking the eye box beside the layer. SELECT the cutout layer as the active layer. Go to filter > artistic > then choose the Cutout effect. Use the following settings: number of levels = 8; edge simplicity = 0; edge fidelity = 3. Do not forget to apply the filter effect by clicking ok button.
Now select the desaturated layer as the active layer (unhide it first). Pay attention because this might get topsy-turvy when you are unable to follow closely. Now go to the channels tab. You will find next to the layers tab located in the same palette. You find several channels. Focus on the RGB channel. Press CTRL+LEFTCLICK on the RGB channel to select the brightness of the channel.
Now back to the layers tab, create a new layer and name it ‘halftone’. Be careful not to DESELECT the active selection yet. Before proceeding, press SHIFT+CTRL+I to invert the selection (this will select darkness instead of lightness of the image). Now use the FILL tool with BLACK color and fill the halftone layer with the selection still active. The whole image will seem to darken but leave it be.
With the selection still active (on the halftone layer), click the add layer mask button which can be found on the bottom part of the layers palette. See image below to locate the button. After creating the mask, the selection will automatically gets deactivated so do not panic.
Now back to the desaturate layer, apply a filter effect called poster edges. Go to filter > artistic > then select poster edges. Use the following settings for this effect: edge thickness = 1; edge intensity = 1; posterization = 1. (Effects may vary depending on the resolution). After applying the filter effect, change the desaturate layer’s blend mode to PIN LIGHT.
Next, back to the halftone layer. Select the LAYER MASK, not the layer itself. Now while the mask is selected, go to filter > PIXELATE > then select Color Halftone. You may use the default parameters, but if you are not sure, use the following properties: max radius = 8; channel 1 =108; channel 2 = 162; channel 3 = 90; channel 4 = 45. And apply the effect. Lastly set the layer blend mode to overlay.
And that’s it. You have already done the comic book visual style. You can add some comic style dialogue balloons and borders to make it look like it was actually a comic magazine issue!


