Make your own 1950s Pin-up Girl

You’ve seen them—painted posters of models and actresses pinned up on the walls of military barracks to give the boys something to fight for. With this tutorial, you can turn a normal photograph of a woman into one of those vintage pin-up girl posters.
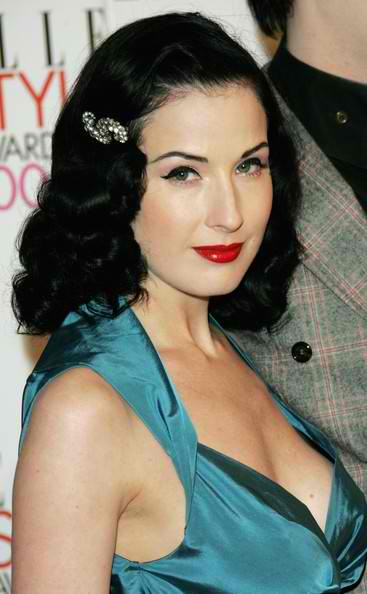
For this tutorial, we will use a photo of burlesque dance Dita Von Teese, courtesy of zimbio.com
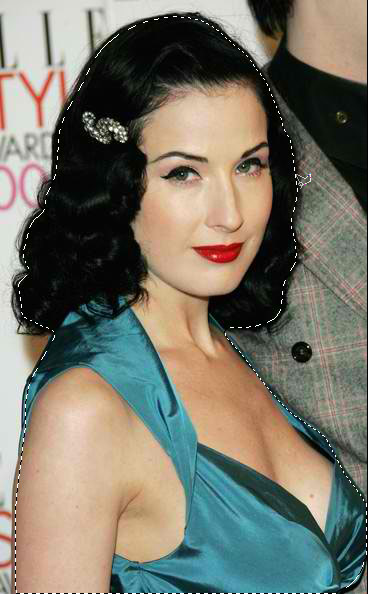
First, select the outline of your model. Use either the regular LASSO TOOL if you have a steady hand or the POLYGONAL LASSO TOOL. You may also use the PEN TOOL if you’re more comfortable with it. Make sure to refine the edge by going to SELECT > REFINE EDGE. Set the values until you are satisfied with the results.
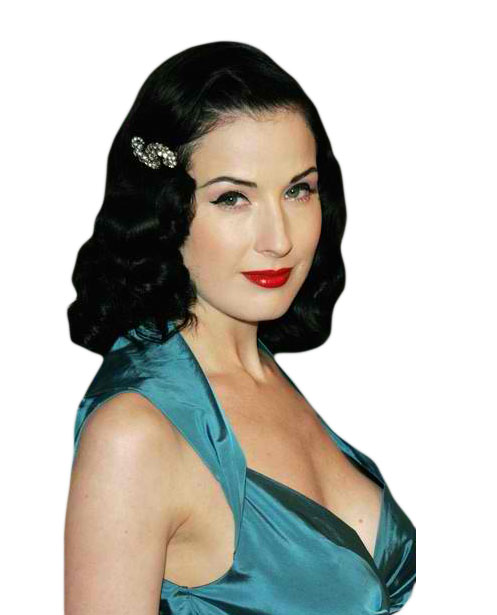
Copy the selection into a new document with a larger canvas. Choose WHITE for the BACKGROUND.
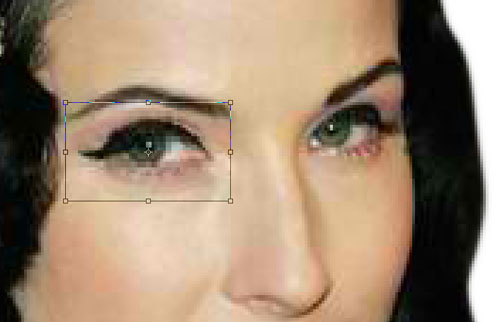
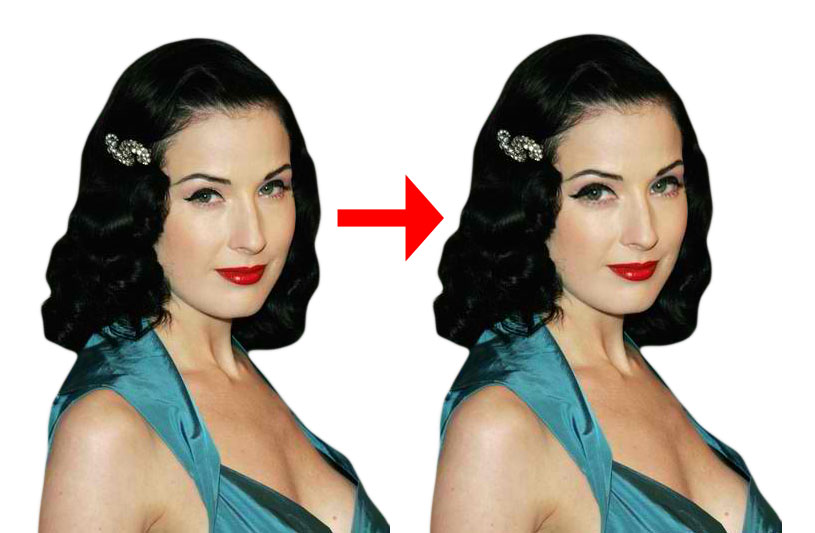
Magnify the picture and make the eyes larger to make it look more cartoonish, but still keeping it pretty. Do this by selecting the area around the eye, copying the eye to a new layer and resizing it. Make sure to refine the edge of the selection to make for a seamless image. Do the same with the other eye until you achieve the desired results.
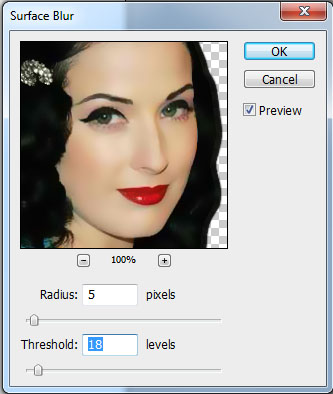
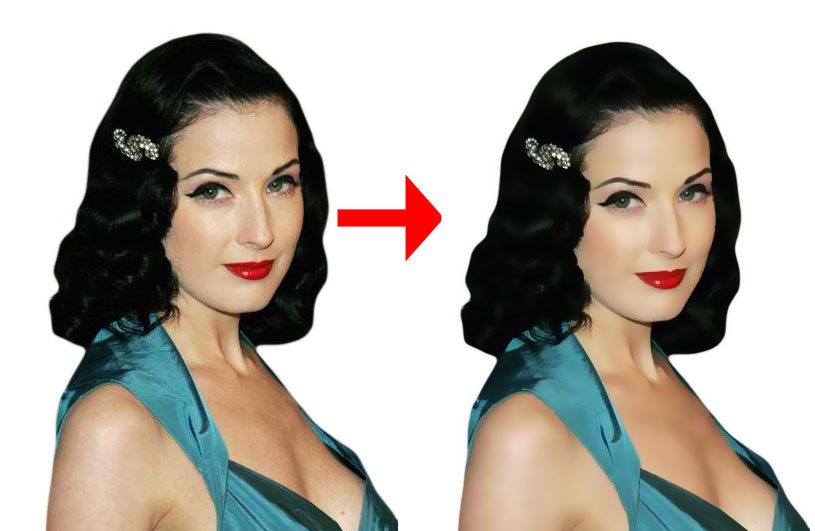
Go to BLUR > SURFACE BLUR and set RADIUS at 5 and THRESHOLD at 18 to get a nice, semi-painted look.
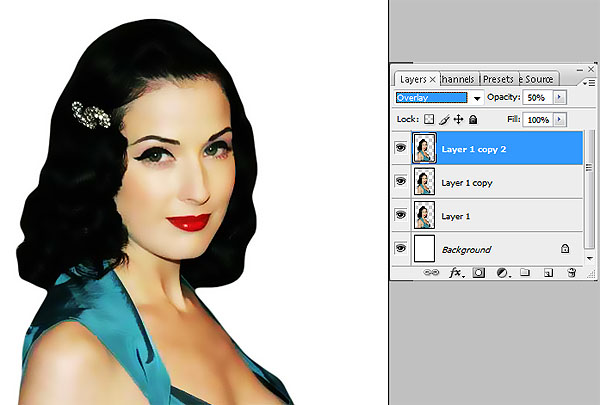
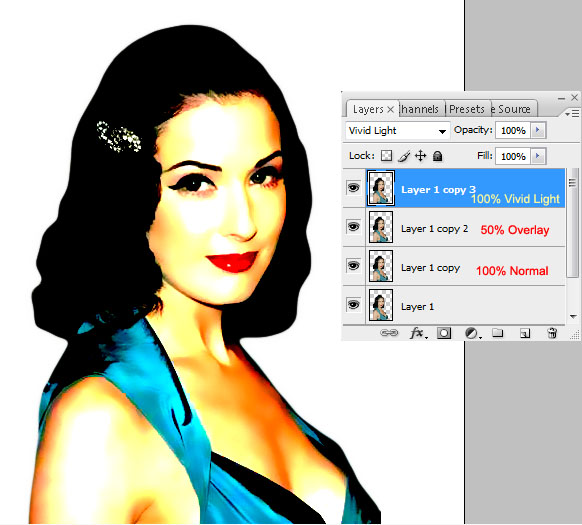
Next, copy this semi-painted into a new layer and set BLENDING OPTIONS to OVERLAY with 50% OPACITY.
Copy the semi-painted layer again and set BLENDING OPTIONS to VIVID LIGHT with 100% OPACITY.
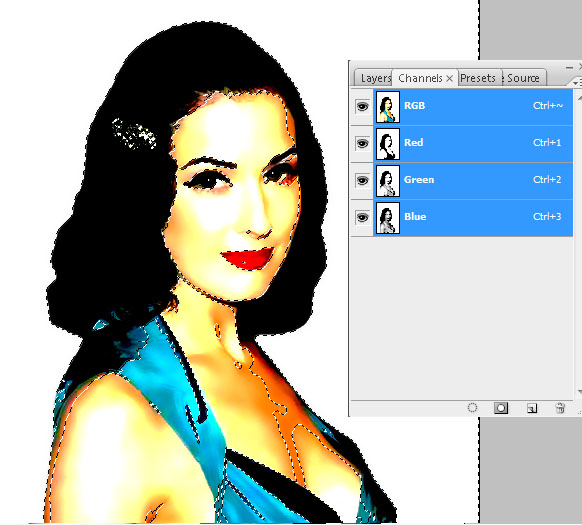
Go to CHANNELS tab. Hold the CTRL key and click on the RGB layer.
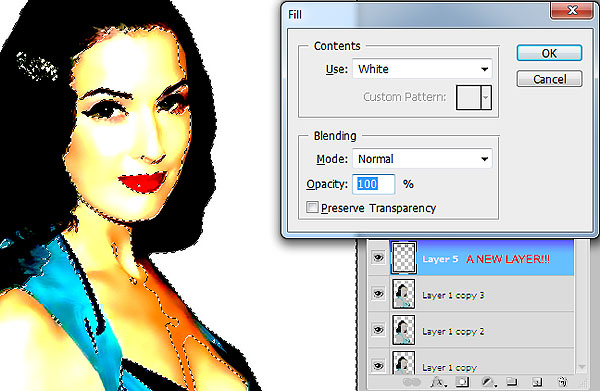
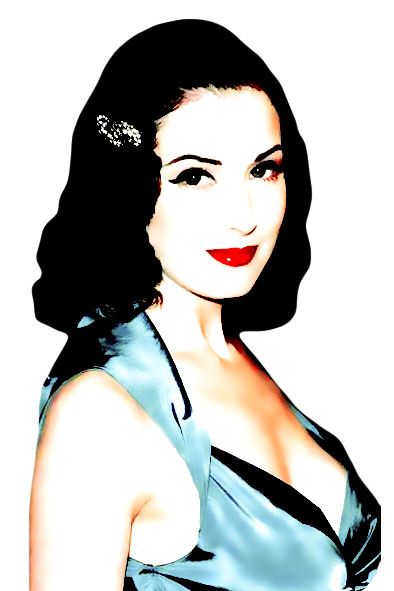
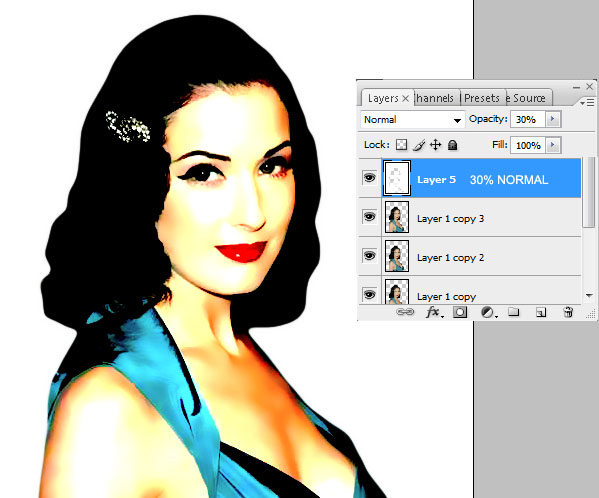
Go back to the LAYERS tab and add a NEW LAYER above the rest. Fill this layer by going to EDIT>FILL or by pressing SHIFT+F5. Fill with WHITE. The result will be the image below.
Change the OPACITY of the newly-filled WHITE layer to 30%.
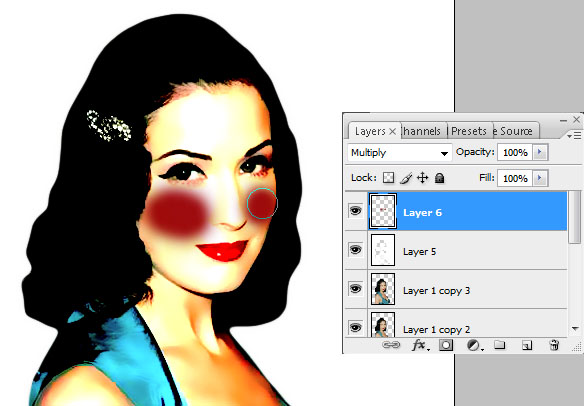
Let’s put on a bit of rouge. Add a NEW LAYER and change the BLENDING OPTIONS to MULTIPLY. Choose a DARK RED color and using a SOFT BRUSH, put the rouge on her cheeks within the new layer.
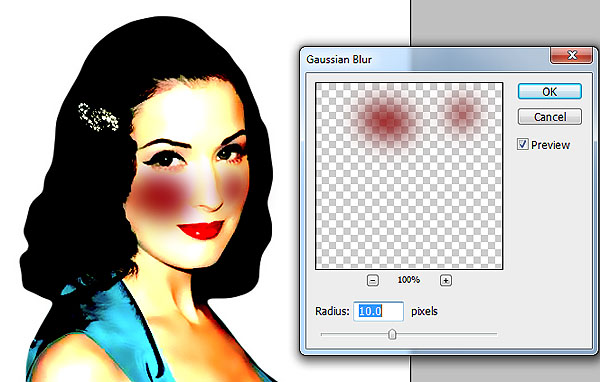
Still on the rouge layer, go to BLUR> GAUSSIAN BLUR and set it at 10. Then, change the OPACITY of this layer to 40.
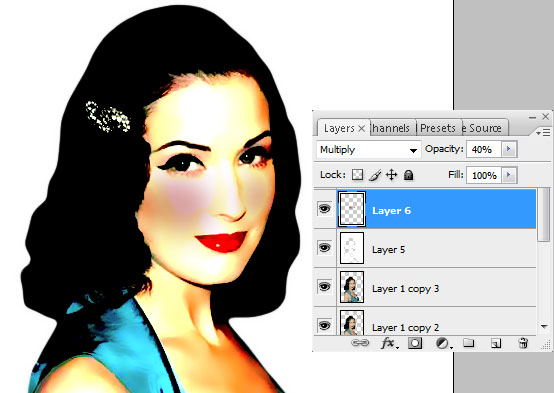
Pick the ERASER TOOL, set it at SOFT BRUSH with 10% OPACITY and begin to gently remove the rouge from her cheeks. Make sure to retain some of the red on her cheekbones for shading purposes.
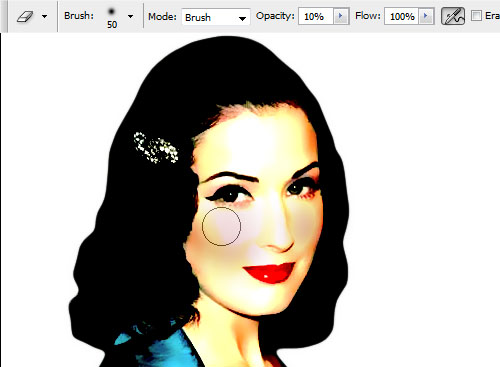
Pick up the BRUSH TOOL, set it at SOFT BRUSH and choose a brighter red color. Then, apply rouge again on her cheeks.
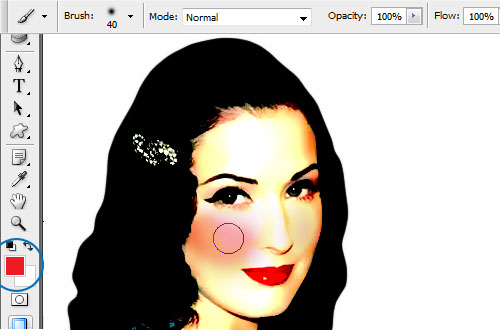
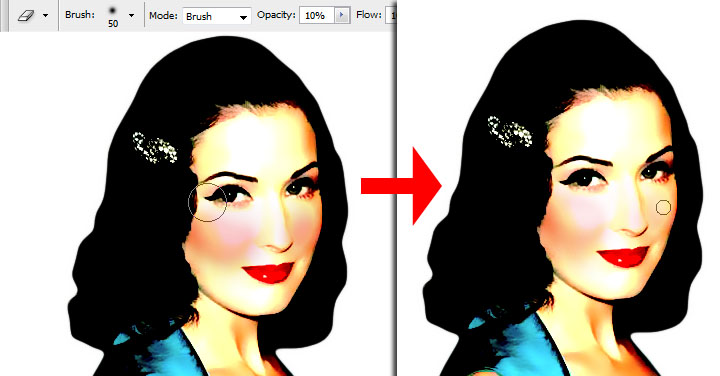
Using the ERASER TOOL, set at SOFT BRUSH with 10% OPACITY, brush away at the rouge to give it a roundish, healthy look. Take notice of where the lighting should be on the cheeks.
Let’s make the hair shine a bit. Create a NEW LAYER. Use a SMALL SOFT BRUSH to pain streaks of white across the hair.
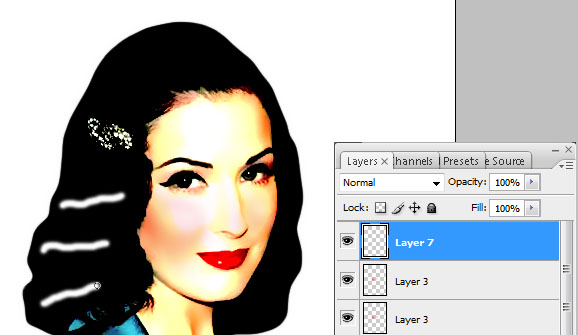
Use the SMUDGE TOOL, set at 50% STRENGTH to spread the sheen on the hair,
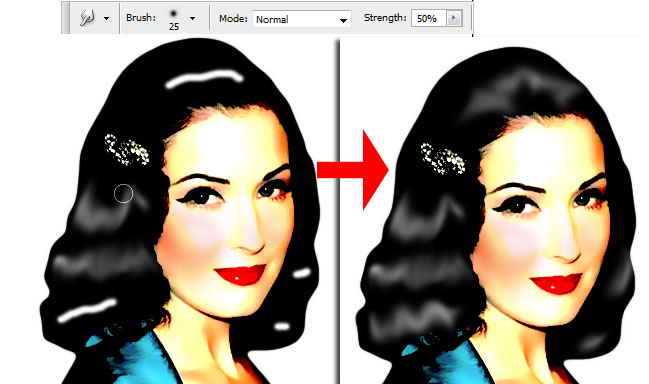
Choose the ERASER TOOL set at 20% OPACITY. Brush away at the sheen to give it a more natural look. Take care to still keep some parts of the sheen brighter to give it a gradient feel.
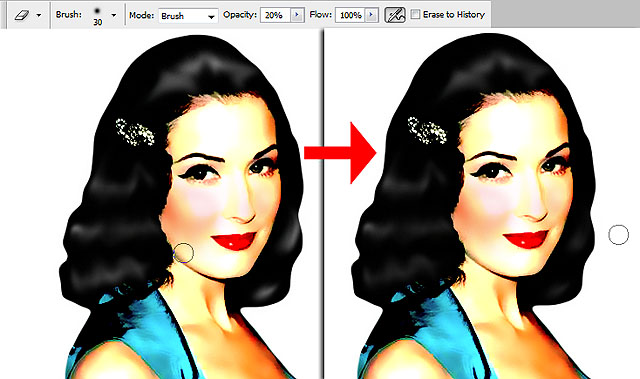
MERGE ALL THE LAYERS and iron out the details. Use the SMUDGE TOOL set at 4% STRENGTH to brush at any hard areas of the image to give it a more painted look.
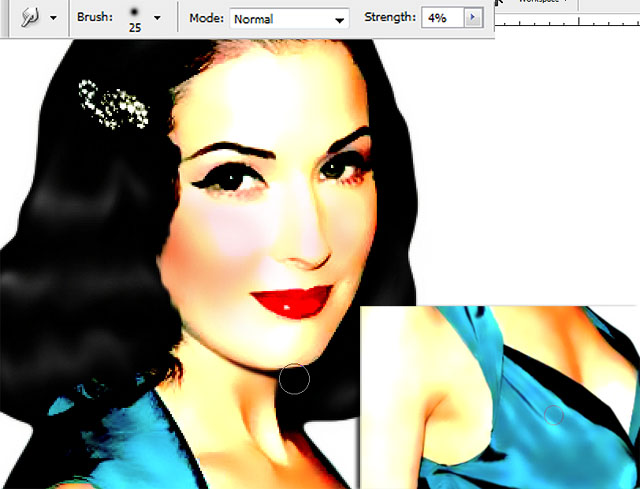
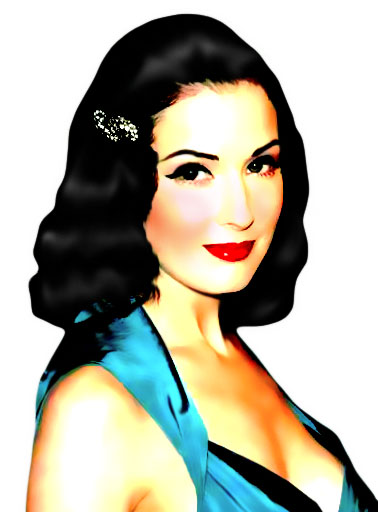
DUPLICATE THE LAYER and set BLENDING OPTIONS to MULTIPLY at 100% OPACITY.
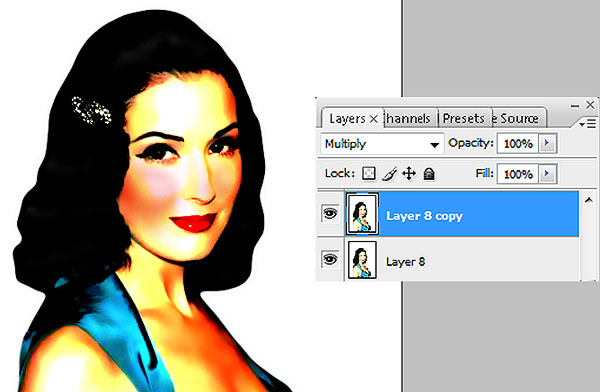
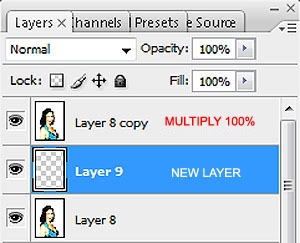
Create a new layer between the duplicated layer and the original merged layer.
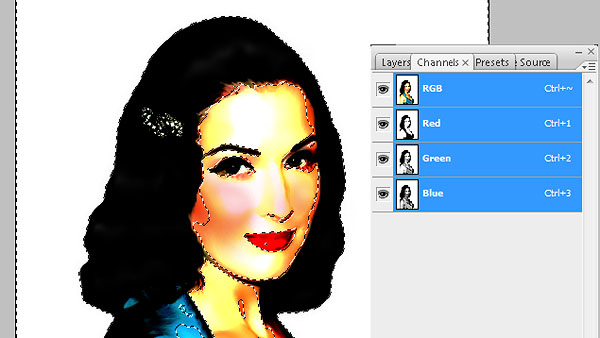
Go to the CHANNELS tab. Hold the CTRL key and click on the RGB layer. Then, press CTRL+SHIFT+I to invert the selection.
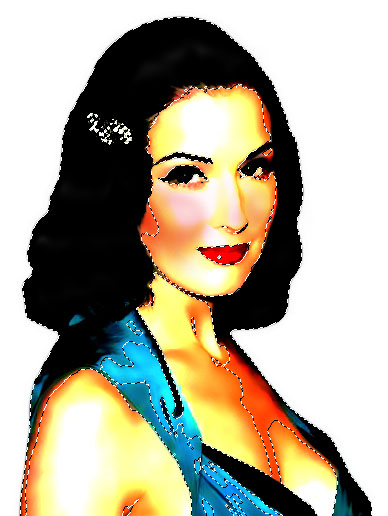
Go back to the LAYERS tab. Make sure you’re in the TRANSPARENT LAYER. First, use the EYE DROPPER tool to pick a skin color, preferably the midtones. Then, go to EDIT> FILL and use FOREGROUND COLOR. Result will be the image below.
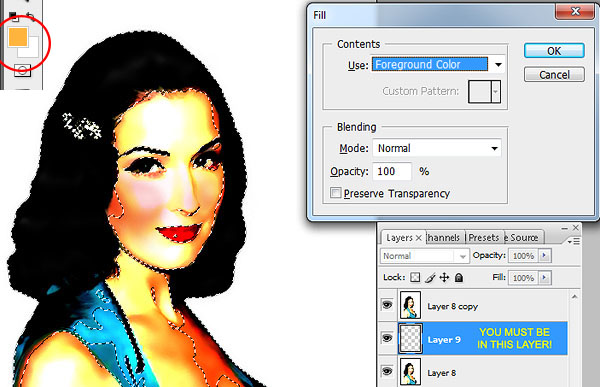
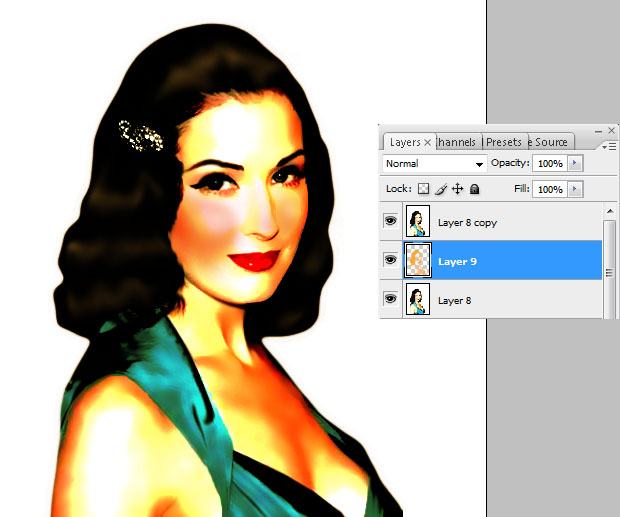
As you can see, the sheen of the hair also changes to an orange tint. This can easily be fixed by using the BRUSH TOOL set at SOFT BRUSH. Still on the same layer with the orange / skin color tint, pick the color WHITE and begin brushing away. Do the same for the dress.
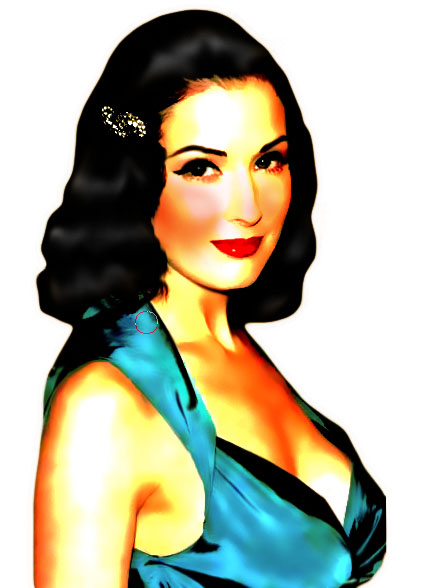
Now it’s time for the background. MERGE THE VISIBLE LAYERS. Then, using the MAGIC WAND TOOL, select the white background.
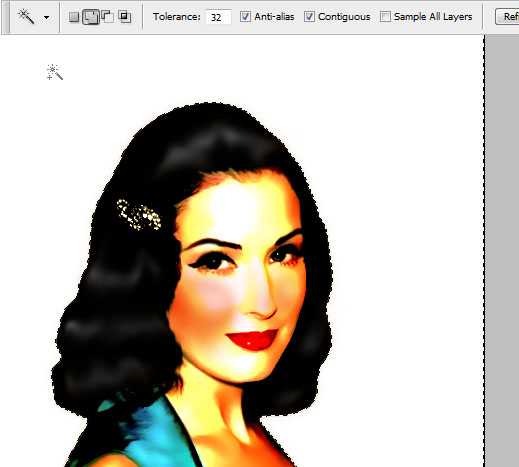
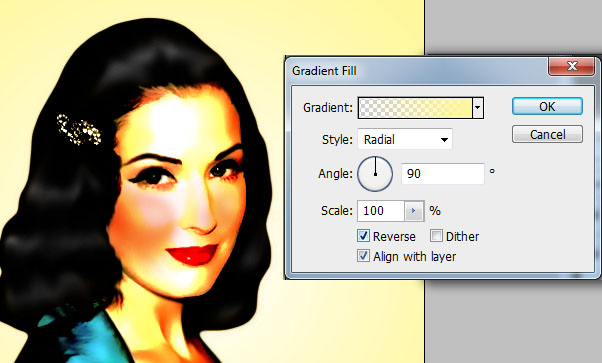
Go to LAYER> NEW FILL LAYER> GRADIENT. Choose a fleshy, yellowish tint and set it at RADIAL. Make sure the center of the RADIAL is WHITE. Reverse if necessary. MERGE THE LAYERS.
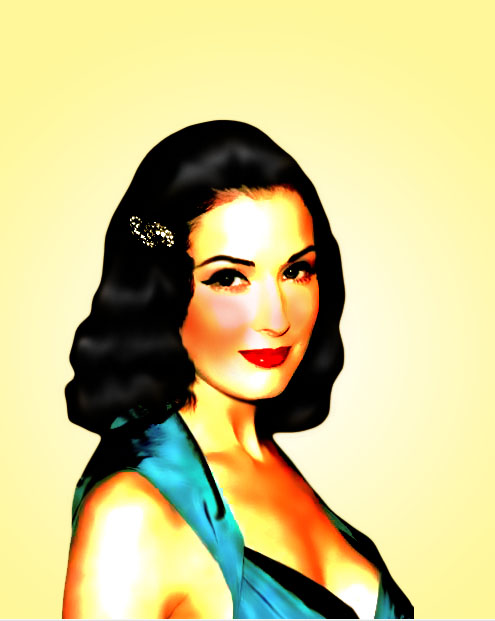
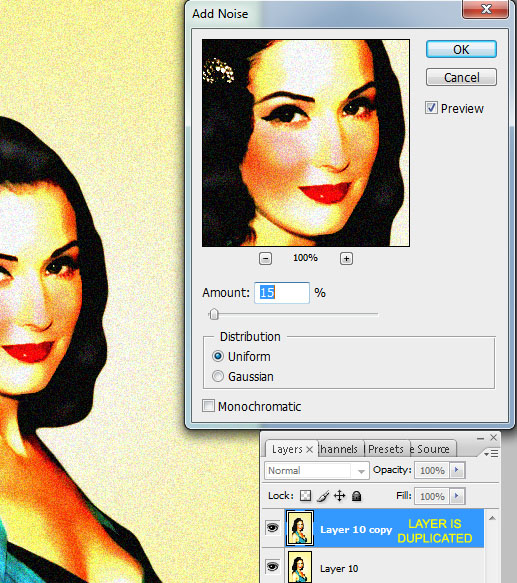
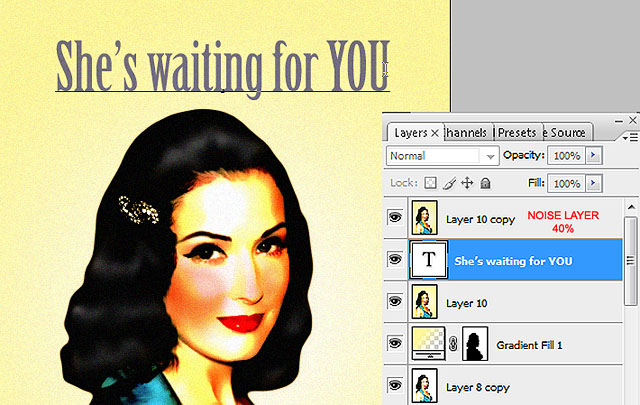
Duplicate the recently merged layer. Go to FILTER> NOISE> ADD NOISE and set it at UNIFORM, with 15% for the AMOUNT. Then, reduce the OPACITY of this NOISE LAYER to 40%.
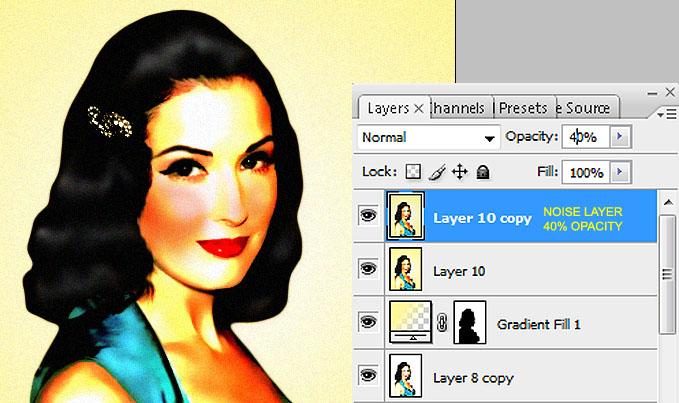
Add your text below the NOISE LAYER. Choose a DARK BLUE color. This will be the result.
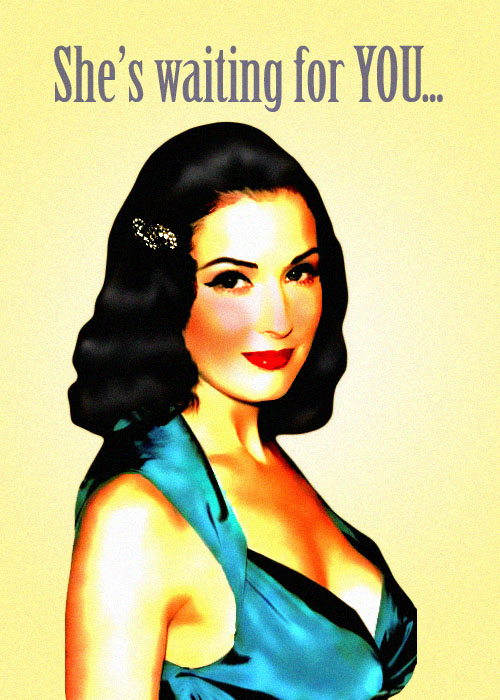
You can stop at this point in time. However, if you think she’s a bit too pale, there are still some last few tricks we can do.
FLATTEN THE IMAGE by going to LAYERS> FLATTEN IMAGE. Add a NEW LAYER and set the BLENDING OPTIONS to MULTIPLY. Then, use the EYE DROPPER tool to pick a MIDTONE color of her skin and begin brushing over the skin with a SOFT BRUSH.
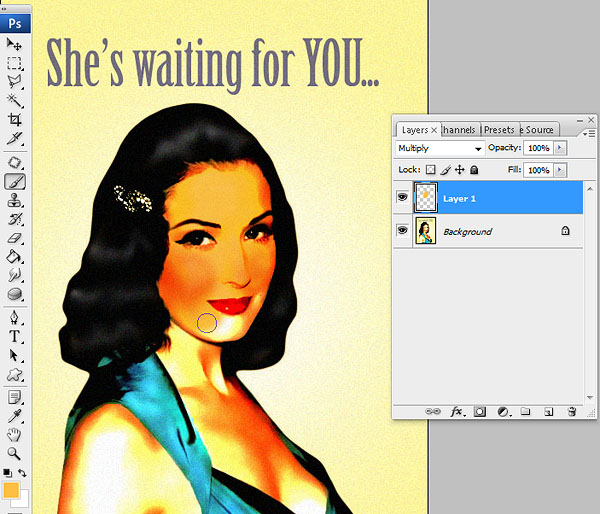
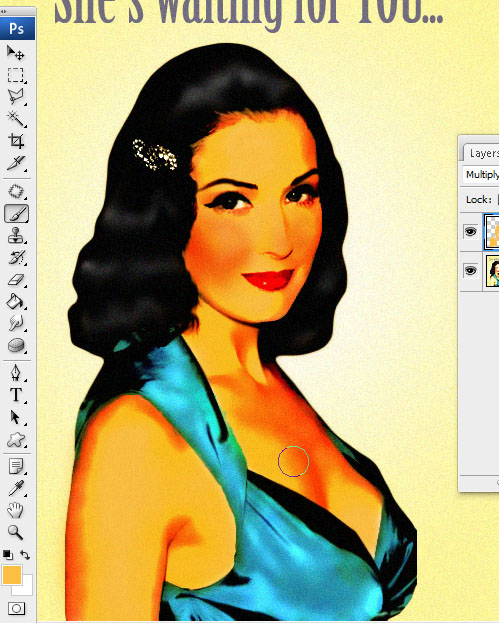
Then, using varying size of ERASER TOOL set at SOFT BRUSH with a 20% OPACITY, begin erasing the areas where it should be lighter until you achieve the results below.
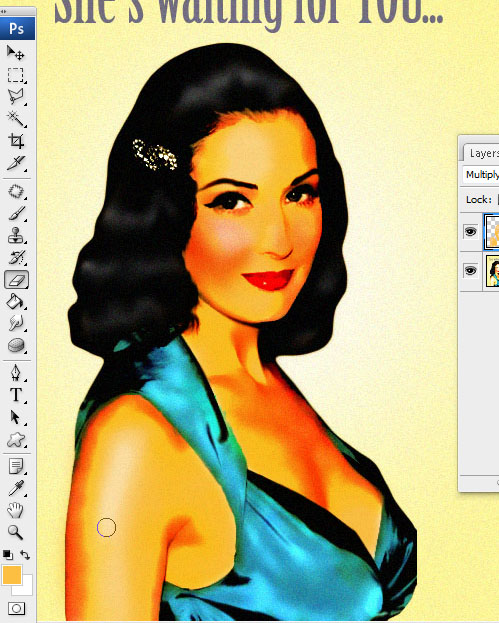
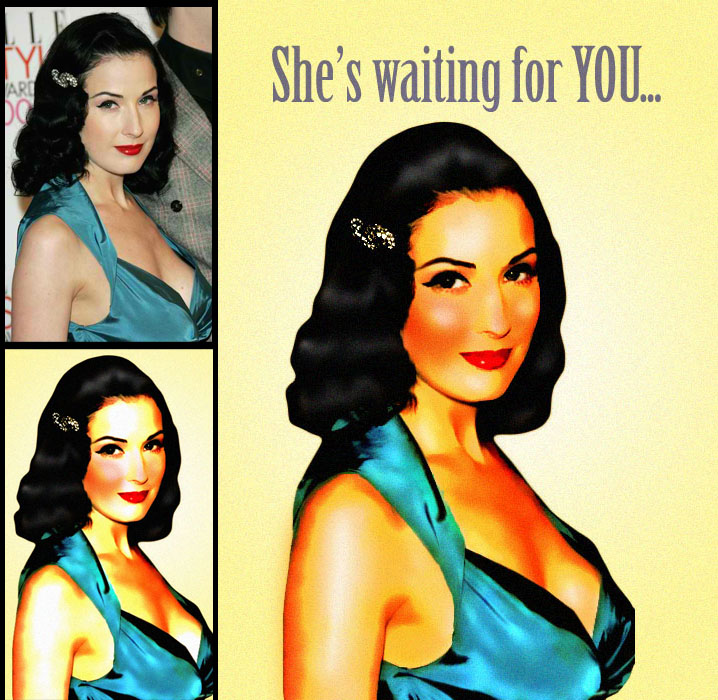
So there you have it, a 1950s Pin-up girl. Please share your creations in the comments. Now go find a lonely soldier to send it to.

