Be One with the Blur – Create a Cool Bokeh Effect in Photoshop

The Bokeh effect is a term in photography referring to the way the lens of a camera renders the blurred or out of range focus light. These blurred lights are usually seen as the distant lights found in the background of an image. A popular setting for Bokeh lights is from the distant lights from night time shots in the city streets.
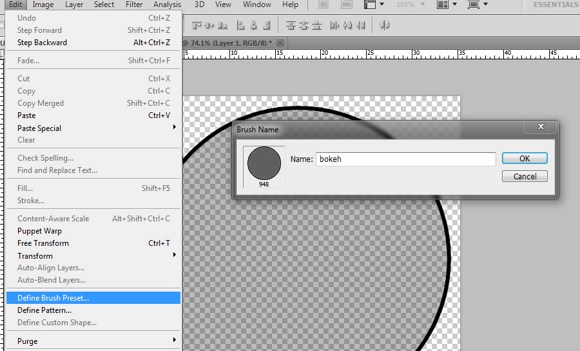
First part in creating the effect is creating your own brush. This technique will also be useful in the future when you need to create your own Photoshop brushes. Do these steps: create a new document in Photoshop 1000×1000 pixels with transparent background. Create a perfect circle using the ellipse shape tool with black as the base color. Then add stroke with the right amount of pixels (see thickness below), black color and is located INSIDE the circle.
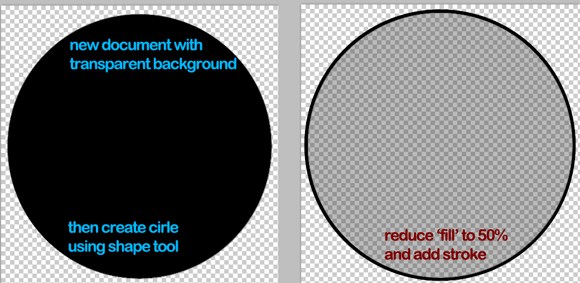
Once you have done this, go to Edit > and click on Define Brush pattern (make sure the circle is selected). Save this pattern named as “bokeh”.
Now you have the brush ready, proceed to create a new document with a landscape size. Any size will do as long it is in landscape. Use a DARK GRAY, not pure black as the background color for the whole thing to work.
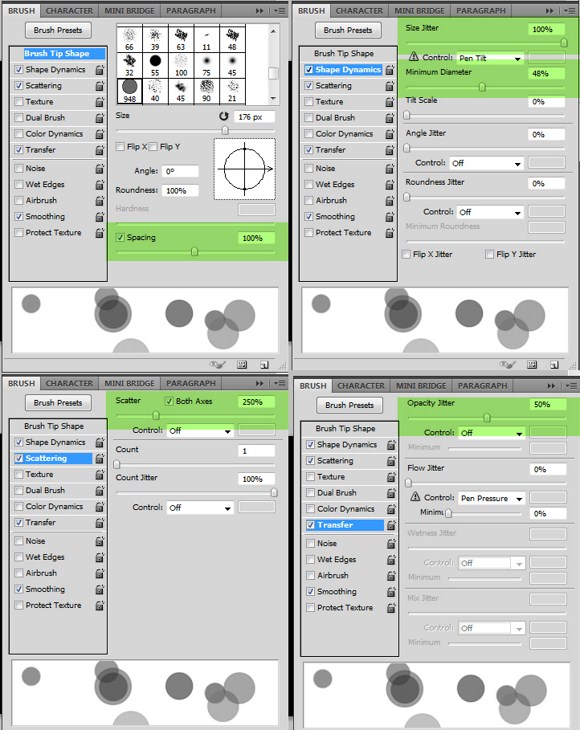
Activate the brush tool (hotkey: B), and find the ‘bokeh’ brush you have just created a while ago. Bring up the brush options by pressing F5 key. You will see several tabs or menus which will contain sub menus.
On the BRUSH TIP SHAPE, adjust the spacing to 100%. Notice how the circles appear farther from another as you set it higher. Enable the SHAPE DYNAMICS and set the Size Jitter to a max amount of 100 percent. Adjust the minimum diameter to any amount lower than 50 percent.
Now apply scattering then set the scatter level to at least 250 percent. Setting it too much high will paint the brush on much wider range in random placements. In other words, it will be too scattered. Lastly, apply transfer (also known as other dynamics in other versions), and then set the opacity jitter to at least 50 percent.
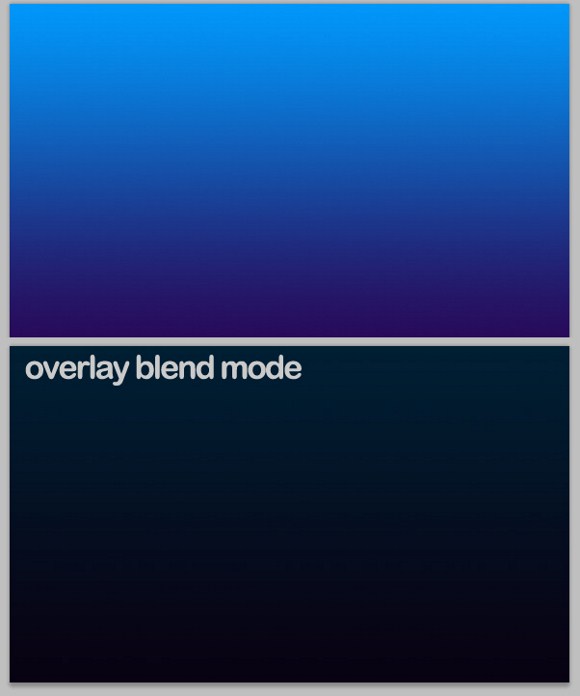
Before painting on the circles, fill a new layer with a gradient of your choice, and then change the blend mode to overlay. Blue and violet are good colors to try with. Also you can apply more than 2 colors and with different gradient directions even including diagonal.
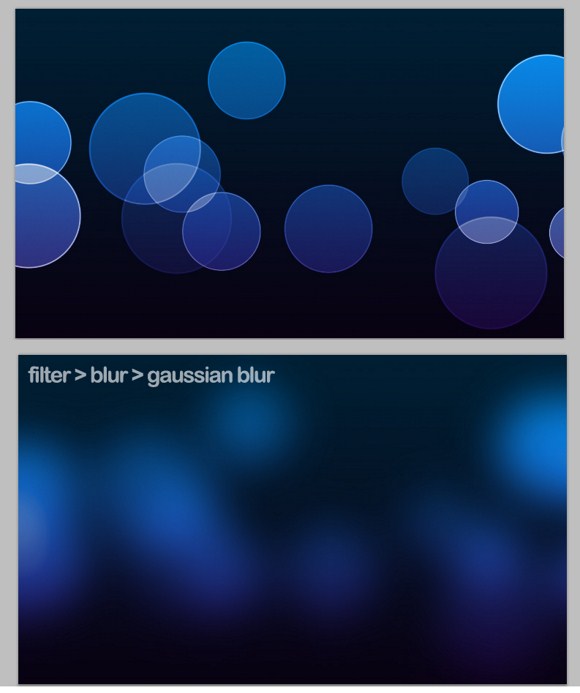
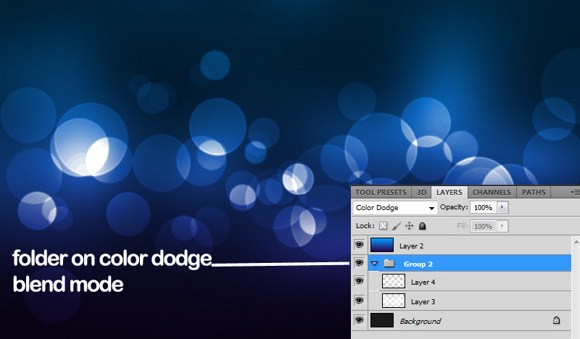
Create a new folder and set the folder’s blend mode to color dodge. Next, create a new layer between the gradient and background. Paint the bokeh brush over the area using white color and the settings above. After painting, apply this to the layer, Filter > Blur > Gaussian blur. Adjust the radius until you achieve something like this. The amount of radius applied depends on the document resolution and dimensions.
Next, paint again another set of circles but this time, use a smaller brush size, using only filter effect Gaussian blur of 1 or 2 radius size, and lastly a lot more circles. Remember that this layer must be inside the folder.
And basically you are done with the simulation of the bokeh effect. You can add more circles with varied amounts of Gaussian Blur to create several depths of lights. Add a catchy text phrase and overlayed glows to create a more spectacular effect.
We hope that you enjoyed this tutorial and that you will find it useful in your future designs. Please feel free to ask any questions or share your creations with us in the comments.

