Bursting with Creativity? Check Out this Awesome Sunburst Photoshop Tutorial

This tutorial will show you how to create a very cool sunburst or rising sun effect on Photoshop.
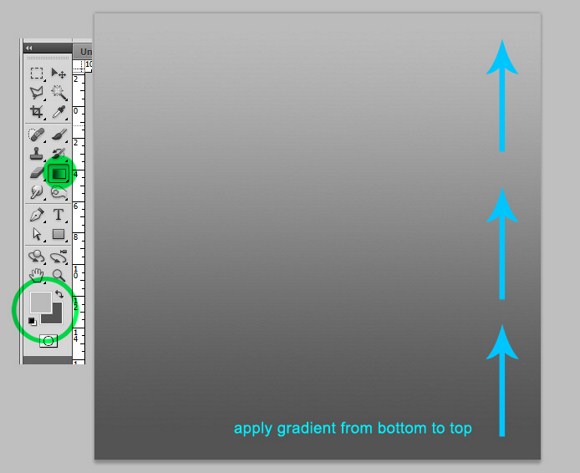
First create a square sized document like 800×800 pixels. This document is for the sunburst image which is also known as the rising sun effect. Select 2 shades of gray for the foreground and background color. You must not choose pure black or pure white.
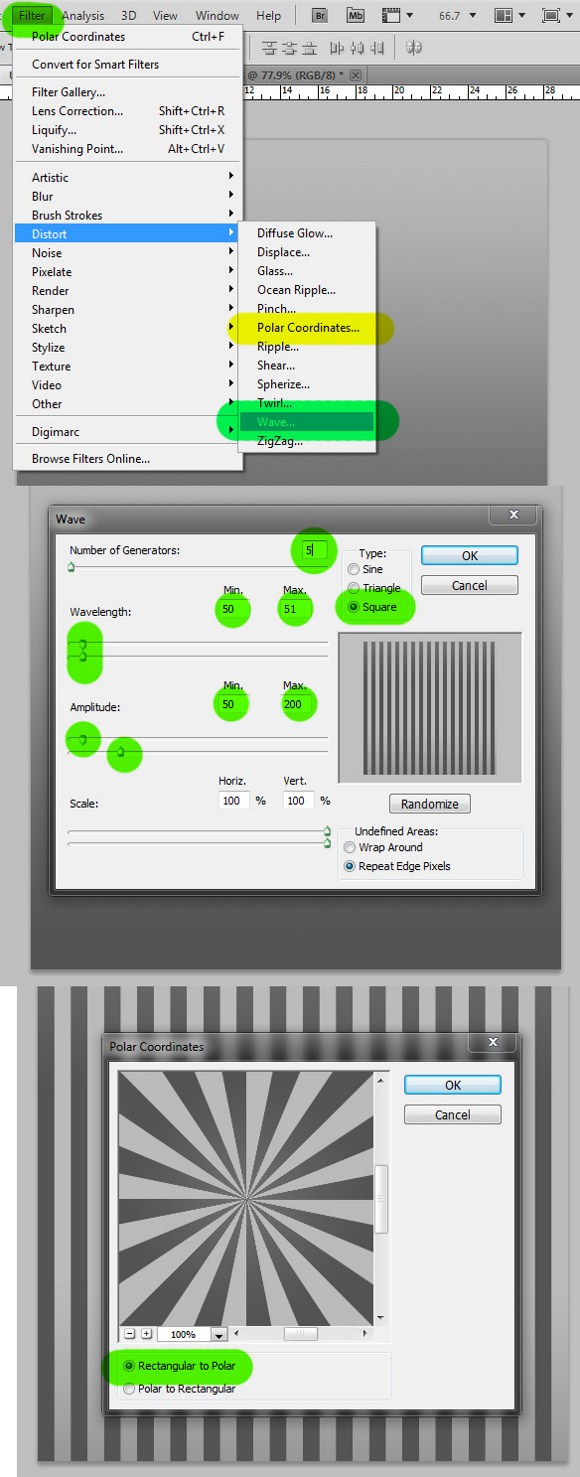
After the gradient part, go to filters > distort > wave. Set the number of generators to 5, change the TYPE to SQUARE, set the WAVELENGTHS max to 51 and min to 50, change the amplitude max to 200 and min to 50.
After creating the stripes pattern, go again to filters > distort > then apply the POLAR COORDINATES and check RECTANGULAR TO POLAR. The result should now create the sunburst effect.
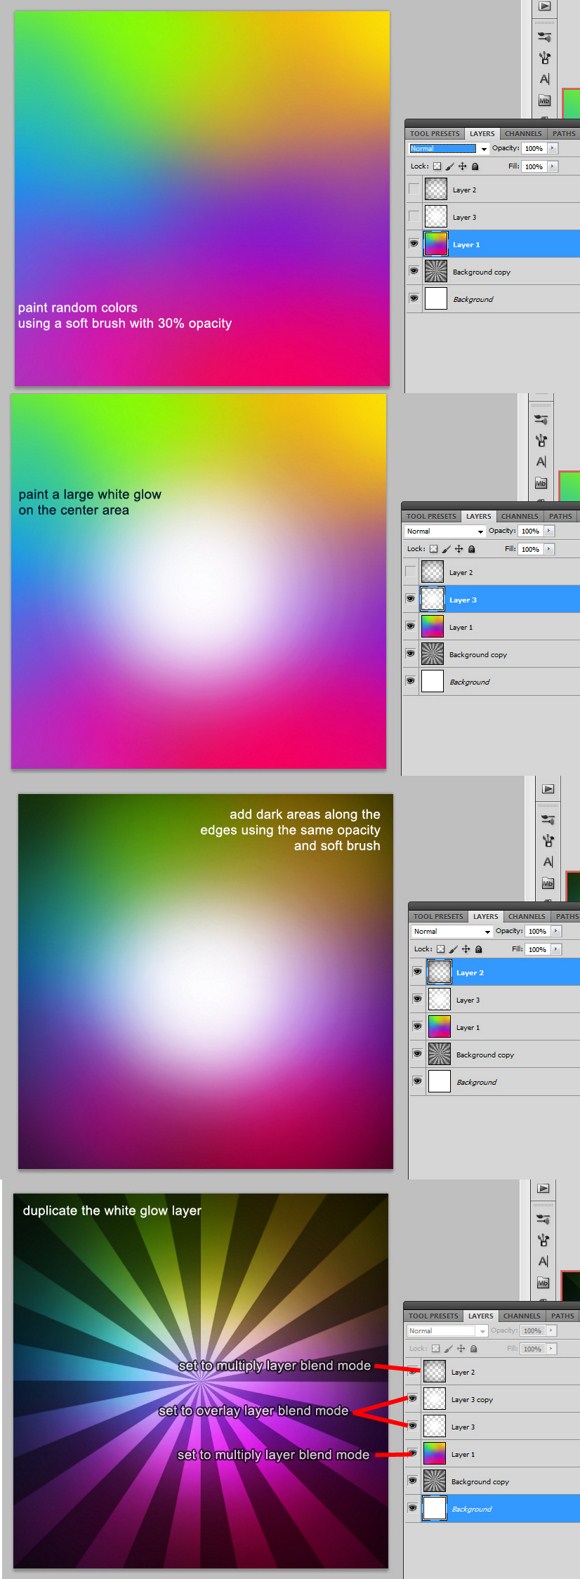
Now we move on to putting some radiant colors on the sunburst. Create a new layer. Select the brush tool (hotkey B) and set its opacity to 30 percent, and a brush size of approximately 300 to 400 pixels. Using random colors, paint all over using the brush settings. It is suggested you paint in the manner used below.
Next, create a new layer again, and paint a large, pure white glow in the middle area. You may adjust the brush size to suit your taste. Now, paint some black areas on the edges using black color.
Duplicate the white glow layer, and use these following layer blend mode settings:
The dark edges layer – set the blend mode to MULTIPLY.
The white glow layer – set it to OVERLAY
White glow duplicate layer – set it to Overlay but with 50 percent opacity
And the colored layer – set to MULTIPLY
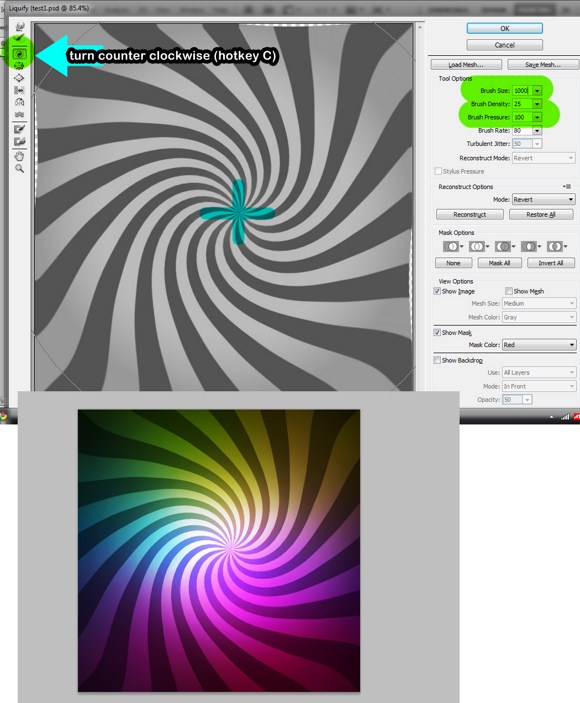
Lastly, select the sunburst layer, then go to Filters > and select LIQUIFY (hotkey SHIFT+CTRL+X). set your brush radius (found on the right side) to about 1000 pixels. Apply pressure on the center, and gradually reduce the size of the brush to achieve much appropriate swirls on the middle. Apply the filter effect.
Ok, so basically, that is how you create the sunburst effect with the swirly stuff. But there is another way to create sunburst or rising sun effects with only two colors.
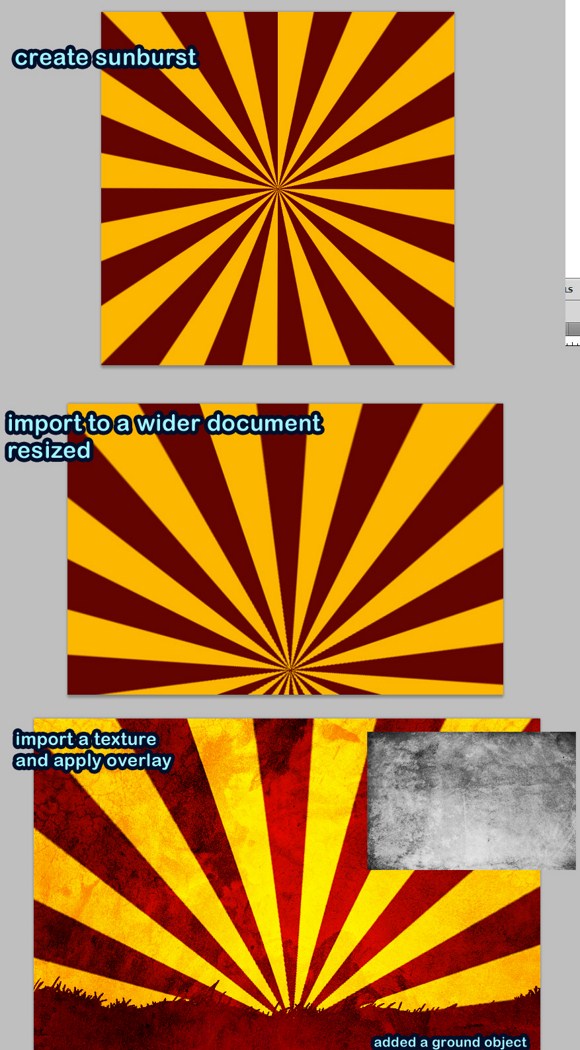
Using the same first steps mentioned above, the gradient + distort wave stuff we did, create a sunburst using and orange/yellow and red pattern. After creating the effect, we import or copy it to a landscape document. Draw a landscape using the default grass brushes.
Then import a paper or grunge texture (the texture layer should be the topmost layer) which you can download from any stock image site. Apply an overlay blend mode to that texture layer and viola we have an awesome landscape with the rising sun effect.
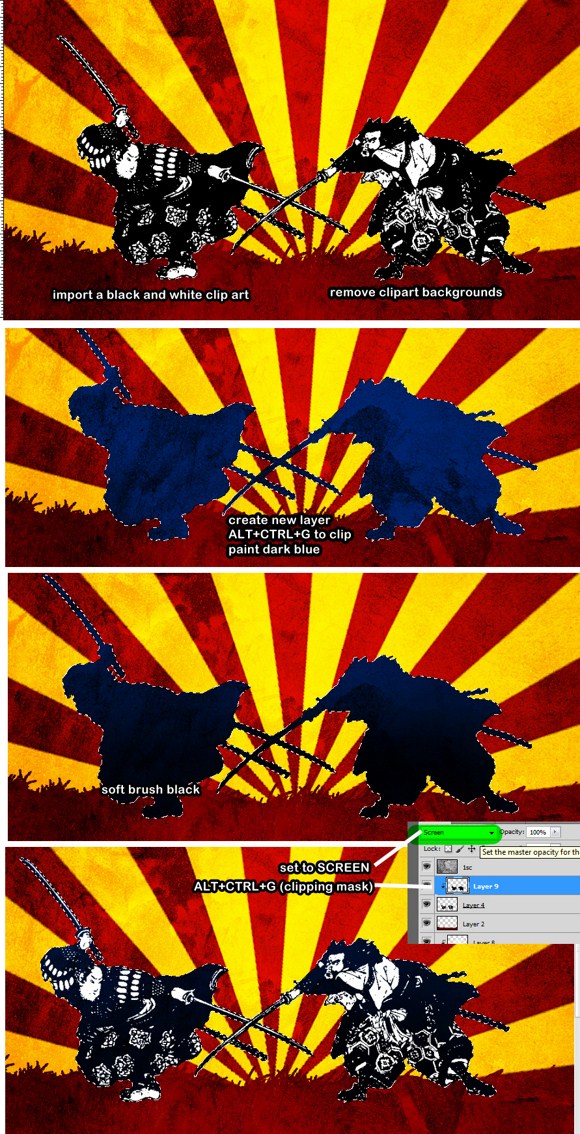
Here’s a bonus. Search the web using these keywords: samurai, geisha, free, and vector. You can also download any VECTOR or SILHOUTTE images to use as subjects in the image. Import it to the document just like the example. Delete the background using the marquee tool. Note: if you can’t find black and white images, you can use Image> adjustments > threshold on your image.
Create a new layer. Press ALT+CTRL+G to clip layer. First paint a dark blue over the clip art. Then paint black later using 30 percent brush opacity on the lower parts. Set the layer to screen.
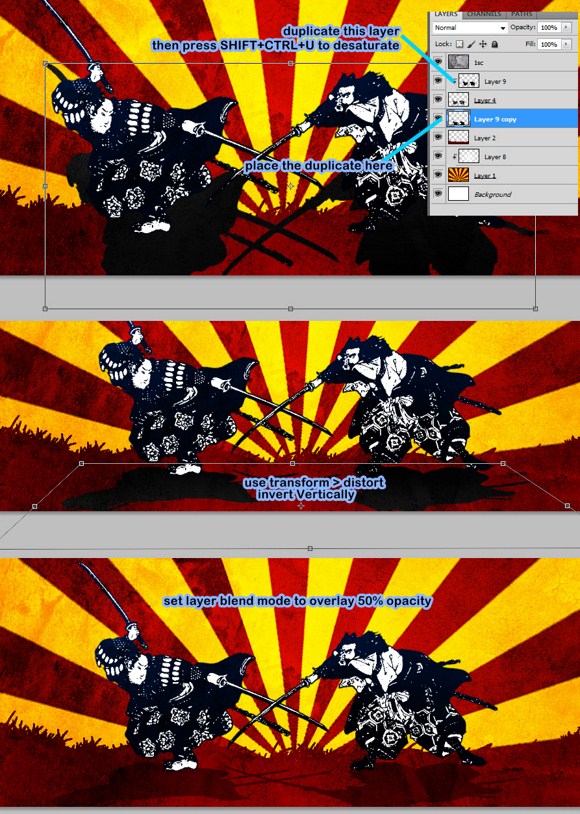
And for the last few steps, duplicate the layer which was clipped earlier (blue and black color), place it below the clipart layer. Transform it, invert it VERTICALLY, then use distort to reshape it into a realistic shadow. Set its layer blend mode to overlay and set the opacity to 50 percent.
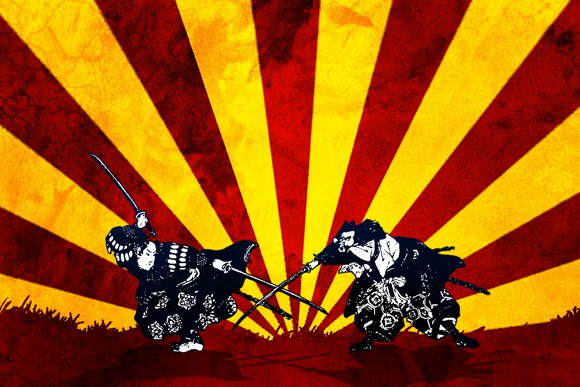
Here is what the finished product should look like:
We hope you enjoyed this tutorial. As always, please feel free to ask questions or share your creations in the comments.
Remember to check back next week for another great tutorial.

