Color Makeovers in Photoshop

In this tutorial I am going to show you the basic techniques on how to alter and adjust the colors of a photo in Photoshop. I will also show you how to add colors to grayscale photographs and images.
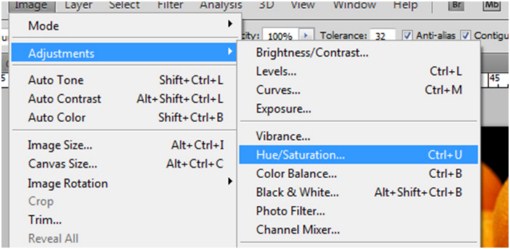
One of the ways to change or alter the color of an image in Photoshop is to use the Hue/ Saturation Tool on the Adjustments tab. You can find it here: go to image> adjustments > then Hue/ Saturation – or you can just press Ctrl+U.
In our project we can use this image of oranges. Our goal is to change the color into something far from orange using the Hue/ Saturation tool.
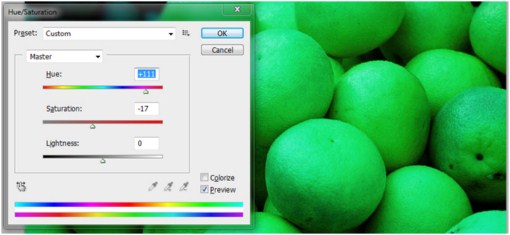
Press Ctrl+U to bring the parameters and options of the tool.
Now try to adjust the Hue to the right and attempt to make the image color green. Or you could also move to the left to achieve some colors closer to the red shade. After you decide the color, click OK to apply the effect.
So what if you need to only change the color of a single orange. Here is what you are going to do.
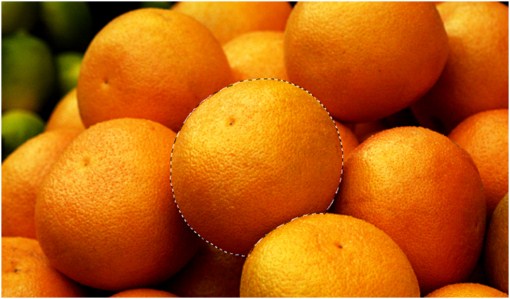
First, use the Marquee tool to select the individual orange.
Now select the single orange using the marquee tool.
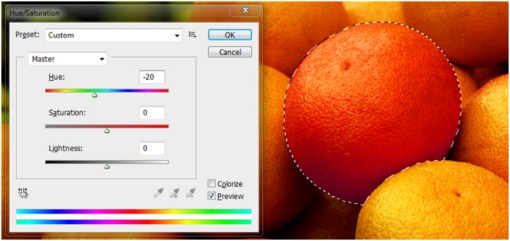
Go to the Hue/ Saturation Tab again or press Ctrl+U. And adjust the hue parameter to achieve whatever color you like to apply.
Because we have excluded the other orange fruits by using the Marquee Selection tool, we have only altered the color of one single orange rather than changing the color of the entire image. This technique is quite useful and important when you need to edit or adjust a single element or object of a certain image. Or you could do the opposite and change the hue of all the other oranges. Here is another popular trick used in Photoshop- excluded colors
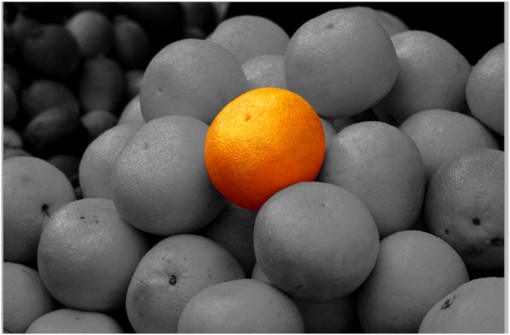
The goal now is to maintain the orange color of a single fruit while the rest of the image goes balck and white or gray scale. There are many other techniques to achieve this effect but this step is the most simple of all.
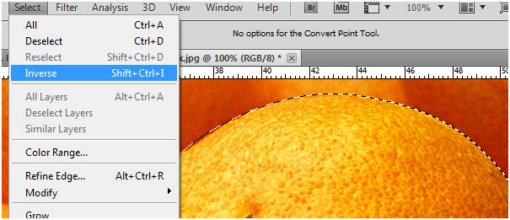
Select the individual fruit again using the Marquee selection tool. Now this time go to Select> Inverse to inverse the selection. This step should EXCLUDE the chosen fruit from the rest of the image.
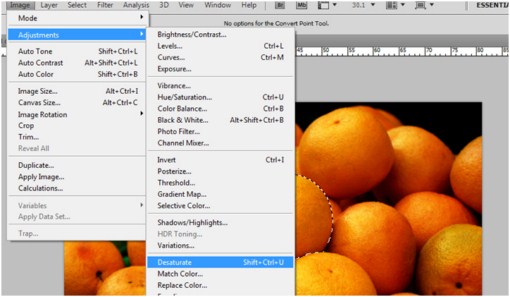
Now go to Image> Adjustments> then locate and press Desaturate.
Press Ctrl+D afterward to cancel the selection. And there you have it!
Another Technique in applying colors to a colorless, gray scale image is taking advantage of layers and LAYER BLEND MODES. For example, we have here a grayscale version of the fruits image.
Now what we need to do is color at least one fruit using the blend modes and layers.
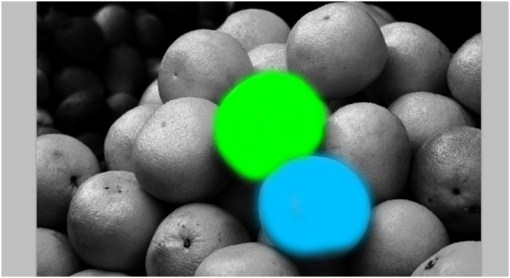
First create a blank layer by pressing Shift+Ctrl+N. You should have 2 layers back on the layer palette. Now you MUST select the blank layer first. Start using the brush tool, but first select a decent color not black, white or grays.
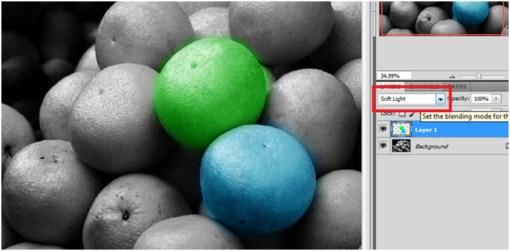
Now try to imitate what I did here. I just select a couple of colors then painted on the chosen orange fruits.
Change the blend mode into Soft Light, and see how the effect applies.
You can also use the same technique when encountering tasks such as making white tshirts into red colored ones. Just like this example where we have a plain white tshirt. What we need to do is to make a red colored t shirt. The steps are just the same but only using a different type of blend mode.
What we have here is a plain white shirt.
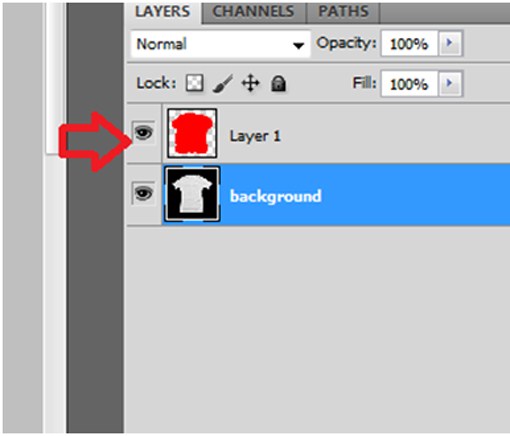
Now create a blank layer by pressing Shift+Ctrl+N . Select this blank layer. For this case, let us just use the color red to paint over the shirt on the layer you just created.
See to it that you paint on the blank new layer not the background/ default layer.
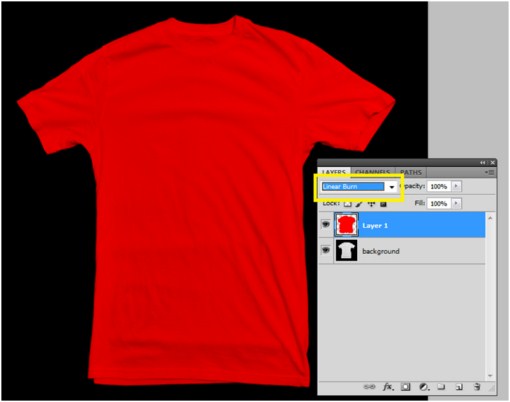
Now change the blend mode to LINEAR BURN.
And that’s it.
As you can see changing colors of certain elements in photos is quite easy with Photoshop but can be very useful. Please ask any questions you may have and remember to share your images in the comments.

