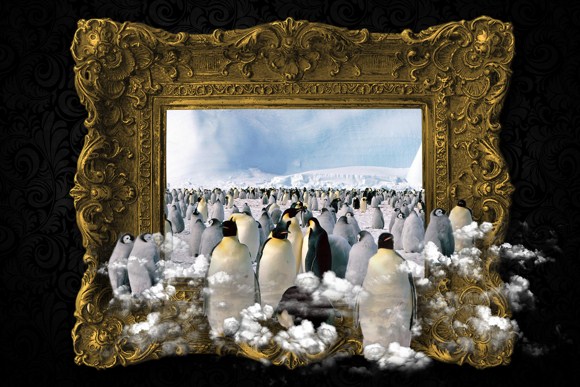
Painting Comes to Life Part 2 – Create a Magical Penguin Land in Photoshop

We may have already a similar effect and tutorial for this on the same site, but I would like to share a much magical and complicated procedure that surely offers a more convincing final output. This project will cover channel manipulation and tremendous amount of masking and cut-and-copy routines. All you have to prepare and download before starting is images of classic or old painting frame, a free photograph of penguins, and lastly a free stock photograph of aerial shot clouds.
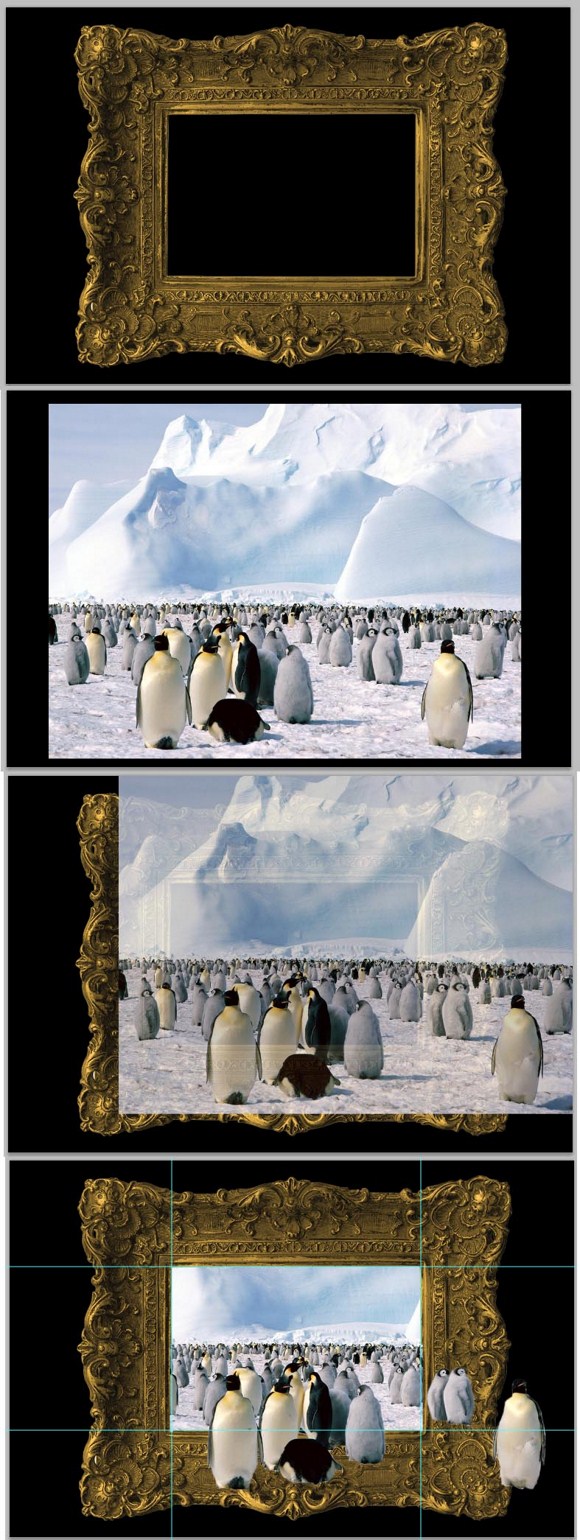
Once you have all those stock photos required, you are ready to start the project. First, create a landscape oriented document and import the frame image to it. Use a black background color for this project.
Place or import the picture of penguins you have downloaded. If photo needs enhancement (example, contrast and colors), you will have to do it in a separate document. Place the penguins above the frame. Arrange them in the layers palette.
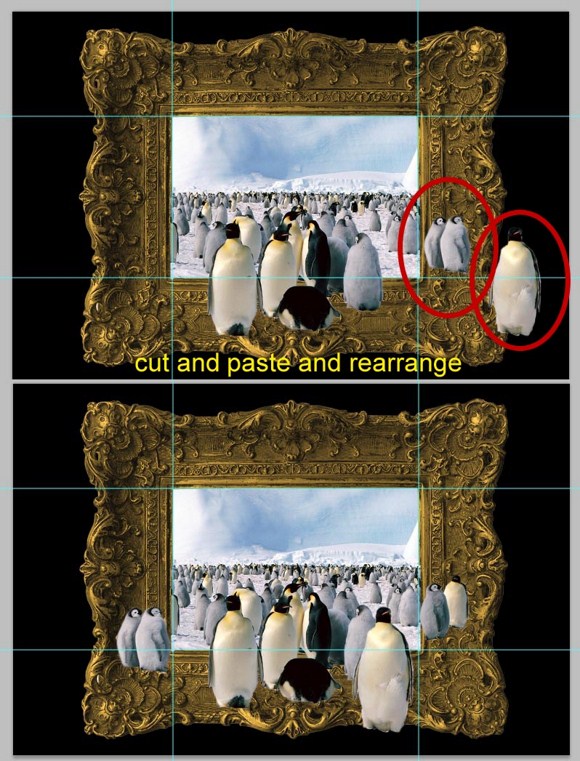
Now this part might be pretty tricky. The goal is to place the penguin layer perfectly so a certain part will become aligned with the frame’s center. I know it is quite complicated and confusing; you may want to view the image below on how I placed the penguin layer. Reducing the layer opacity helps you to see through objects, so it helps you arrange the layers. Rulers and guidelines (the cyan colored lines you see on the images below) will also help you know where the frame borders are located.
After placing the objects where they should be, proceed on REMOVING the areas outside the frame except for the penguins located in the foreground. You can use Marquee, Eraser, or Masking tools and techniques on removing the unnecessary parts. Do not forget to restore the opacity of every layer.
After the removal of the unnecessary areas, create a duplicate layer of the penguin layer for backup purposes and hide it. We may need it in the future. Look at the image below. You will see that some of the penguins have been relocated. Also if you look closely, there are penguins added. Use cut and copy to achieve this. You will have to do the free transform tool and the invert horizontally tool to add smaller and larger penguins.
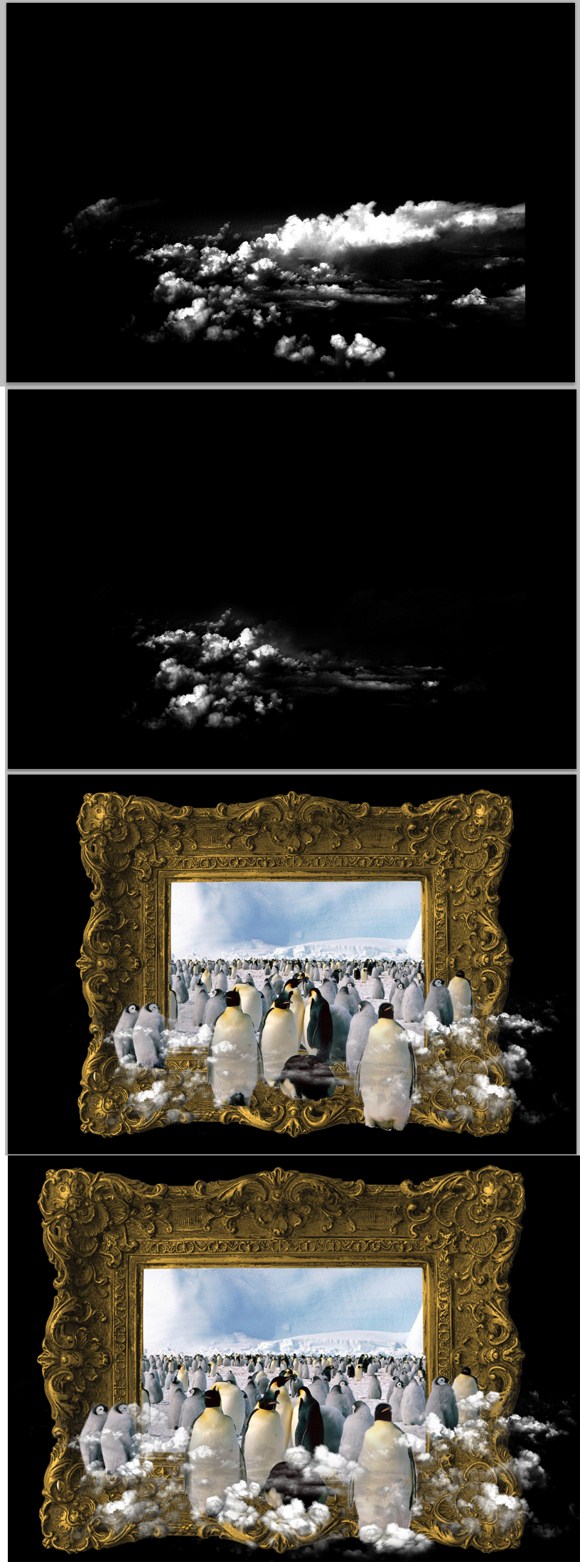
Now on to the next step: adding clouds. Open a downloaded cloud image in Photoshop. Sometimes the quality and contrast of the clouds is too faint so we have to alter using the adjustment tools. In my case I have to maximize contrast, which is needed most of the time.
After improving the contrast, go to the channels palette which is just beside the layers palette. Duplicate the Green Channel. You will also have to hide all other layers which leaves on the GREEN channel copy visible. On the green channel copy, press CTRL+L to bring up the adjust layers panel. Play and learn how the parameters work. Get a result similar to the image shown below.
Next, press CTRL+ LEFT CLICK on the edited green channel, and COPY (CTRL+C). Paste the clouds on the main project. Place the layer on the topmost position. You may set the layer blend mode to screen or not.
After you have placed the clouds, it is time to do modifications. You may want to hide other layers so you won’t get confused with the cluttered screen. You will have to remove some parts of the clouds which are not needed. Use the eraser tool carefully to remove areas.
Repeat the steps above (the channel stuff) to add more clouds. You can also copy clouds and reshape or free transform copied clouds to create a variety of clouds. Arrange the clouds accordingly and neatly where they could also cover the feet of the penguins on the foreground.
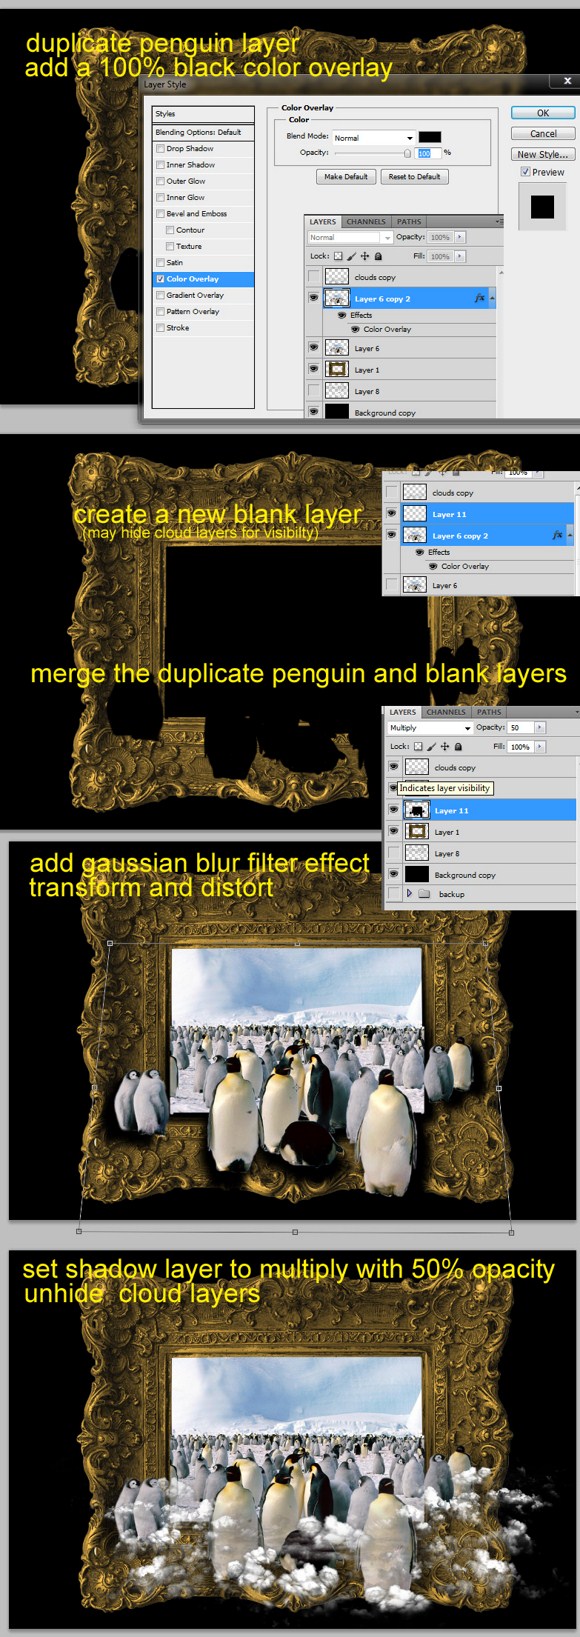
Lastly, is adding the shadows. Duplicate the penguin layer. Put a COLOR OVERLAY effect on it using black. Next, go to Filters > Blur > Gaussian blur, and use a radius of 6-8 pixels (depending on the overall resolution) and apply. Create a blank layer and merge it with the black penguin layer. This will be the shadow layer. Do not forget to place below the original layer.
Free transform > Distort the shadow layer and reshape it to tight trapezoid shape. This will simulate a real shadow. Lastly set it to multiply blend mode and set it to 50 percent opacity.
That is all there is to it. Go ahead and add background texture and apply any other personal touches you like and you will have a great looking image.
As always, please feel free to provide feedback and share with us in the comments.

