Pimp Your Ride: Creating Realistic Custom Car Vinyl in Photoshop

This tutorial will teach you how to visually pimp out any car using Photoshop. You could shop your own car and share it to friends and make them wow with the visual effects you have made.
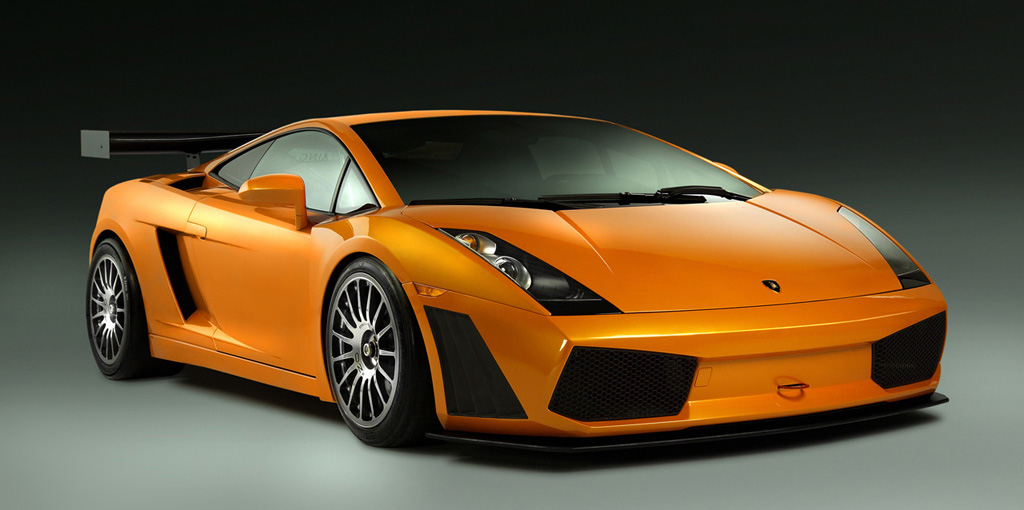
First step is search for an image of any car to download. Make sure this car has in plain or in stock color. It means that car has only one car paint. Our example below is an orange Lamborghini Gallardo, which is a very sweet and exotic car.
After you have downloaded an appropriate image, open it up in Photoshop. You may have to create a backup copy in case you overwrite the original image and want to create another customization. The following steps are going to be very time consuming and quite delicate so expect to get frustrated, but do not give up.
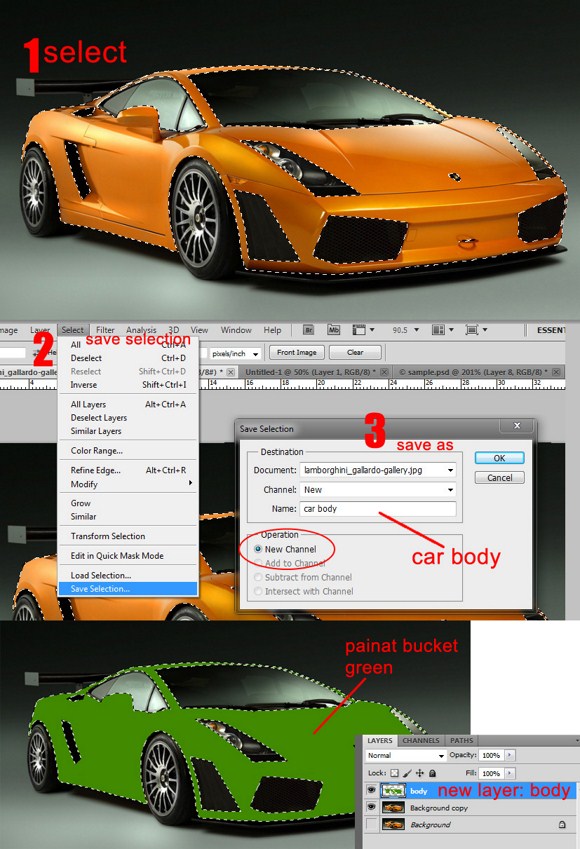
– Now select the car’s body EXCLUDING the windshield, the wheels and rims, the black areas and headlights, and spoiler. You need only to select where the paint are in. you can choose any selection tools you want, in my opinion, it is better to go with the standard marquee tool or the pen tool.
– Let us introduce to you about saving selections. This is a useful practice because it lets you RESELECT to areas which you may have deselected intentionally or unintentionally. Just load the saved selection if in case the shift+ctrl+D keys do not work. Save selection as ‘car body’ or anything close.
– After you have your selection, make sure it is remained selected. Add a new blank layer. Inside the marquee, paint a desired color (example green). This will create a shape of the car body with the chosen color. Before proceeding, hide this layer.
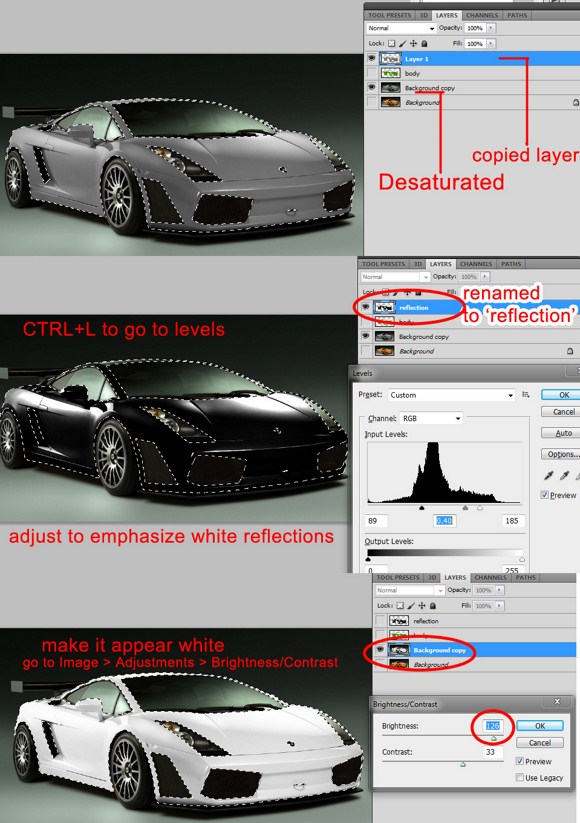
Load the selection if you have it deselected. Copy the selected parts onto a new layer, and name this layer as Reflection layer. You need the car layer (only the selection not the whole layer) and reflection layer DESATURATED. Do this by pressing CTRL+SHIFT+U.
On the reflection layer, go to Image > Adjustment and clock on Levels (or by simply pressing CTRL+L). Now we need this layer to be in high contrast. Adjust the parameters so the reflections are very white, and the areas with no reflections are pure black. Try to follow the knobs to achieve the same result. You can also use the curves tool to do this step. This is an important step to make the overall effect realistic.
Now on the original car layer (do not mind the other background layer, it is for back up purposes), go to Image > Adjustments > brightness/contrast and adjust to make the care like its painted in white.
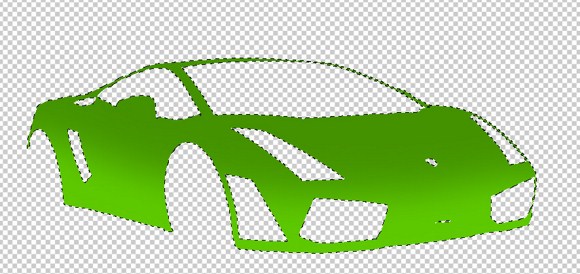
Remember the green colored body layer? Let us temporarily hide all layers except for the body layer. Load again the car body selection then select the brush tool. Choose neon green color (you can choose any color after you have mastered the effect). Paint the lower part of the body using a soft brush with a decent brush size and 50 percent brush opacity. This will give a gradient paint job on the car.
Download and import this PNG to your document. Feel free to use the tribal stamp I made.
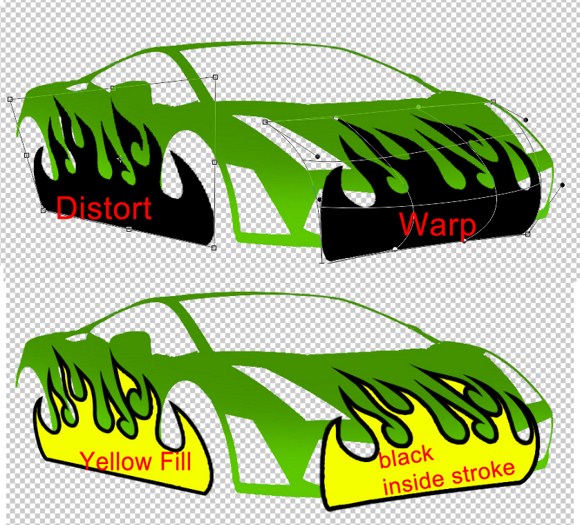
Place 2 copies of the tribal flame in the project. Modify the shapes of each flame object using CTRL+T transform tool. While on transformation mode, you can RIGHT CLICK the box to use the WARP and DISTORTION. After that, add the STROKE and COLOR OVERLAY effects to each of the objects. Just refer to the example below.
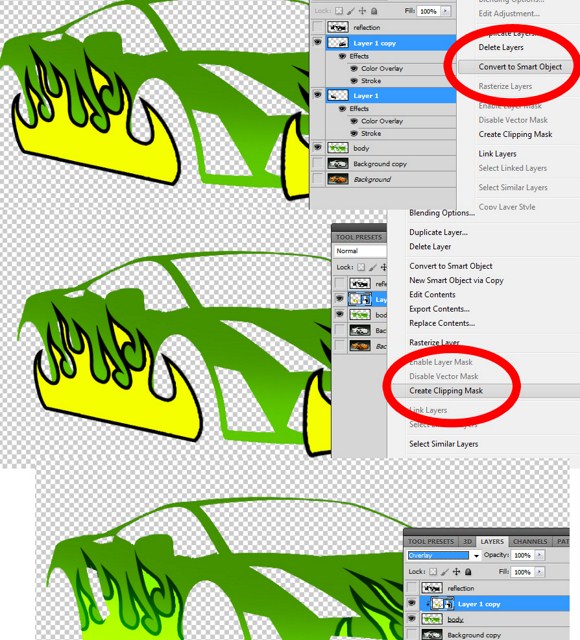
Combine the 2 objects by making it as a smart object. Select the two layers > Right Click to one of the selected layers, then click the CONVERT TO SMART OBJECT. After making it a single object, Right click the layer again, and then click on CREATE CLIPPING MASK. After that, change the blend mode to overlay.
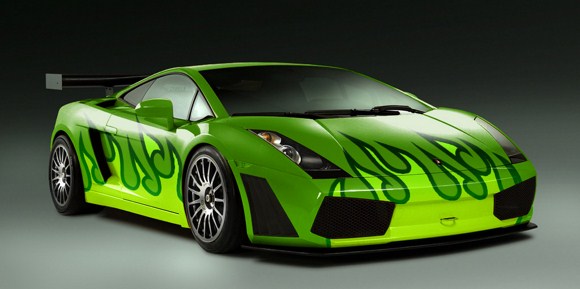
Last part, finally, UNHIDE all layers, set the reflection layer to SCREEN MODE with 80 opacity, and you be surprised at what have you been done. Here is the final output of the project.

