Time to Sweat a Little in this Water Droplet Photoshop Tutorial

This tutorial will teach you how to add water droplets on your photo. While this can be used on other images like soda cans, bottles, leaves and whatnot, in today’s tutorial, we will be using this image of a woman’s face.
The tools you will need for this tutorial is the Hard Round Brush, Soft Round Brush, Smear Tool, Eraser Tool and the Eye Dropper Tool. No need for fancy digital pens; a steady hand and a mouse will do. You will also need to have a good eye for lighting and pinpointing light sources.
This effect will actually look great on cartoons and anime drawings, so don’t limit yourself to actual photographs. Also, if you’re more on the “fun-loving” side, you can even use this trick to create zits, blemishes, and skin imperfections.
And as mentioned earlier, you can also use this on inanimate objects. If not a water droplet, you can use this trick to convey a slow melting of an object…like a candle for example.
Now that you got your image opened and ready, let’s continue with the tutorial.
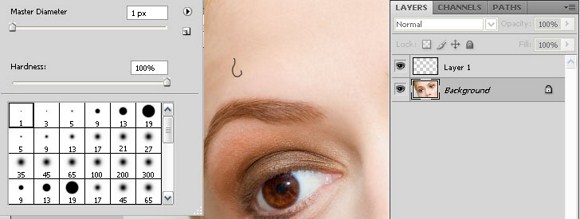
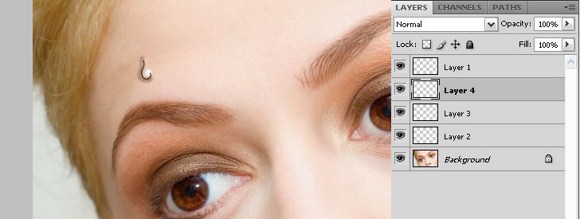
#1 In a new layer, draw a partial outline of a water drop. In this case, we will think of it as a sweat drop. Use a Hard Round Brush, 1 pixel, with 100% hardness.
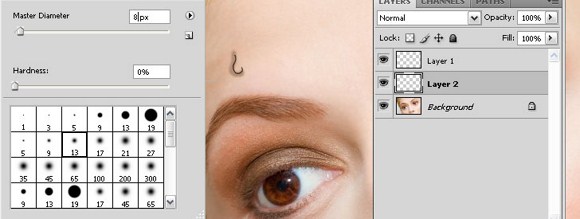
#2 In a new layer below the outline, choose a darker skin tone color using the eyedropper and follow the outline. This will serve as the sweat drop’s shadow. Use a Soft Round Brush, 8 pixels, with 0% hardness.
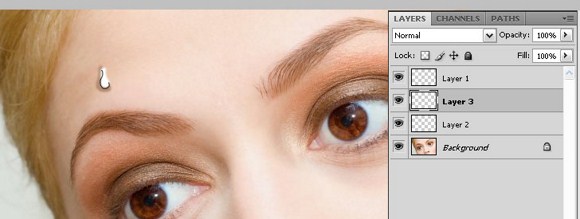
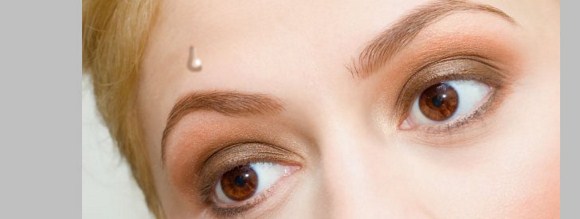
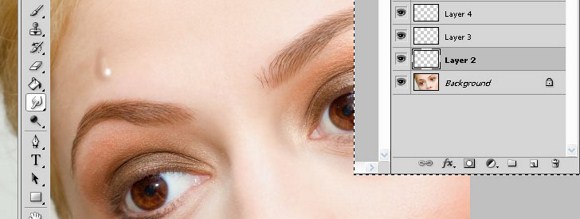
#3 Still below the outline, create a new layer over the darker skin tone layer. Use a Soft Round Brush, 8 pixels, with 0% hardness. Choose the color white and draw an actual sweat drop, using the outline and the sweat drop’s shadow as your guide.
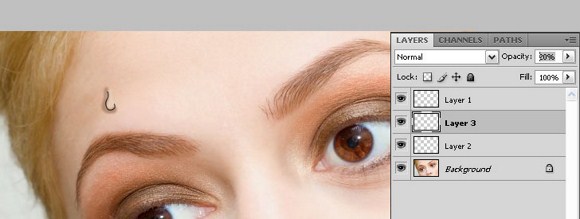
#4 Once done, change the layer opacity to 20%. This will show the transparency of the sweat drop.
#5 Create another layer above the transparent sweat drop. Using a Hard Round Brush, 1 pixel, with 100% hardness, just dab a circle to indicate the source of light. Take note of the light source in your image. In this case, refer to the woman’s eyes.
#6 Now it’s time to make the sweat drop look more realistic. Delete the layer with the sweat drop outline.
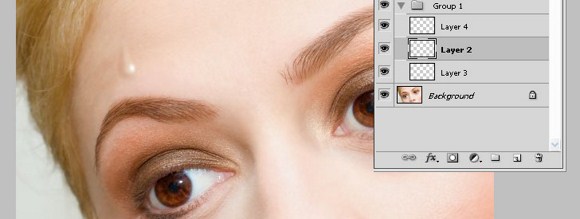
#7 Go to the layer with the sweat drop’s shadow and use the Smear Tool to smear it into the contours of a sweat drop. Do the same with the other layers until you are satisfied. However, make sure to only apply minute changes in the light source layer.
Note: You may also use the eraser tool at Soft Round Brush to lessen the darkness of the shadow.
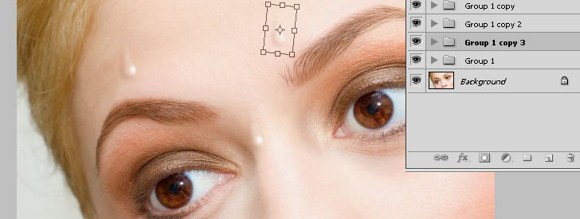
#8 Group the layers of the sweat drop together. Duplicate the groups and put as many sweat drops as you wish. You may also distort it and change the opacity to your liking.
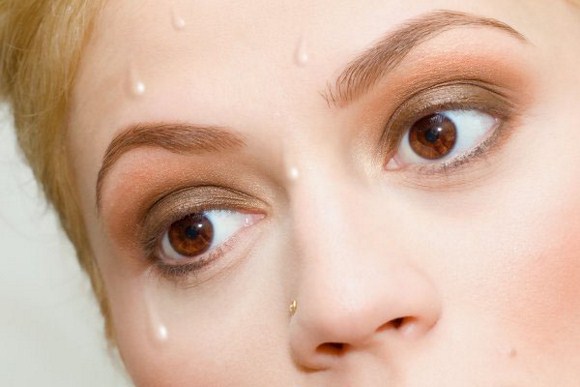
And here it is! Sweat drops, water droplets, or tear drops on your image. Hope you have fun with this trick!
Go ahead an play around with this technique and share your creations with us in the comments.

